How to Make a Before and After Photo on iPhone: A Service-Business Owner's Honest Walkthrough
My techs are in trucks all day. They don't go back to the office, sit down at a laptop, and edit photos in a design suite. They finish a gutter clean in Walker, Michigan, pull out their iPhone, and need to know how to make before and after photo iPhone-native — right there in the driveway — before the next job. I've spent three years nailing down this exact workflow. Here's what actually works, what iOS gives you for free, and why one extra step turns a decent phone workflow into a real marketing machine.
How do you make a before and after photo on iPhone?
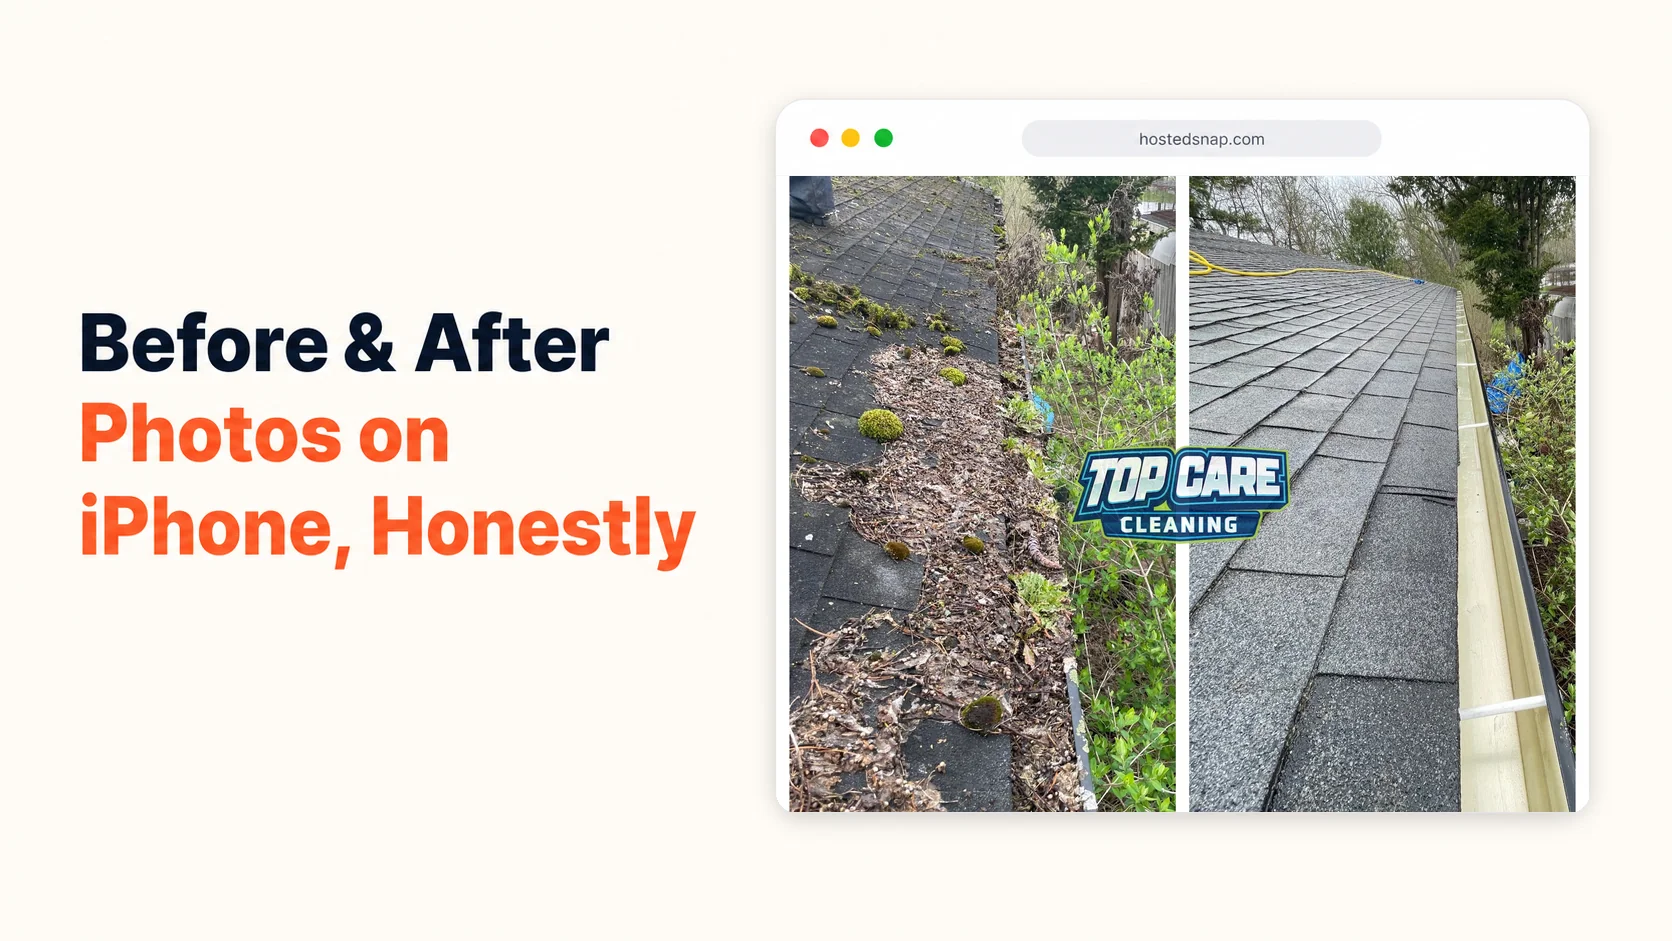
To make before and after photo on iPhone, open Safari and go to a free web-based tool like Hosted Snap — it works on mobile without any app to install. Tap the two upload slots, choose your before and after from your camera roll, and download the combined image in under 30 seconds. The iOS Photos app and Markup tool can technically stitch two images together, but they lack a clean divider and export at reduced quality — fine for personal use, not ideal for a Google Business Profile post.
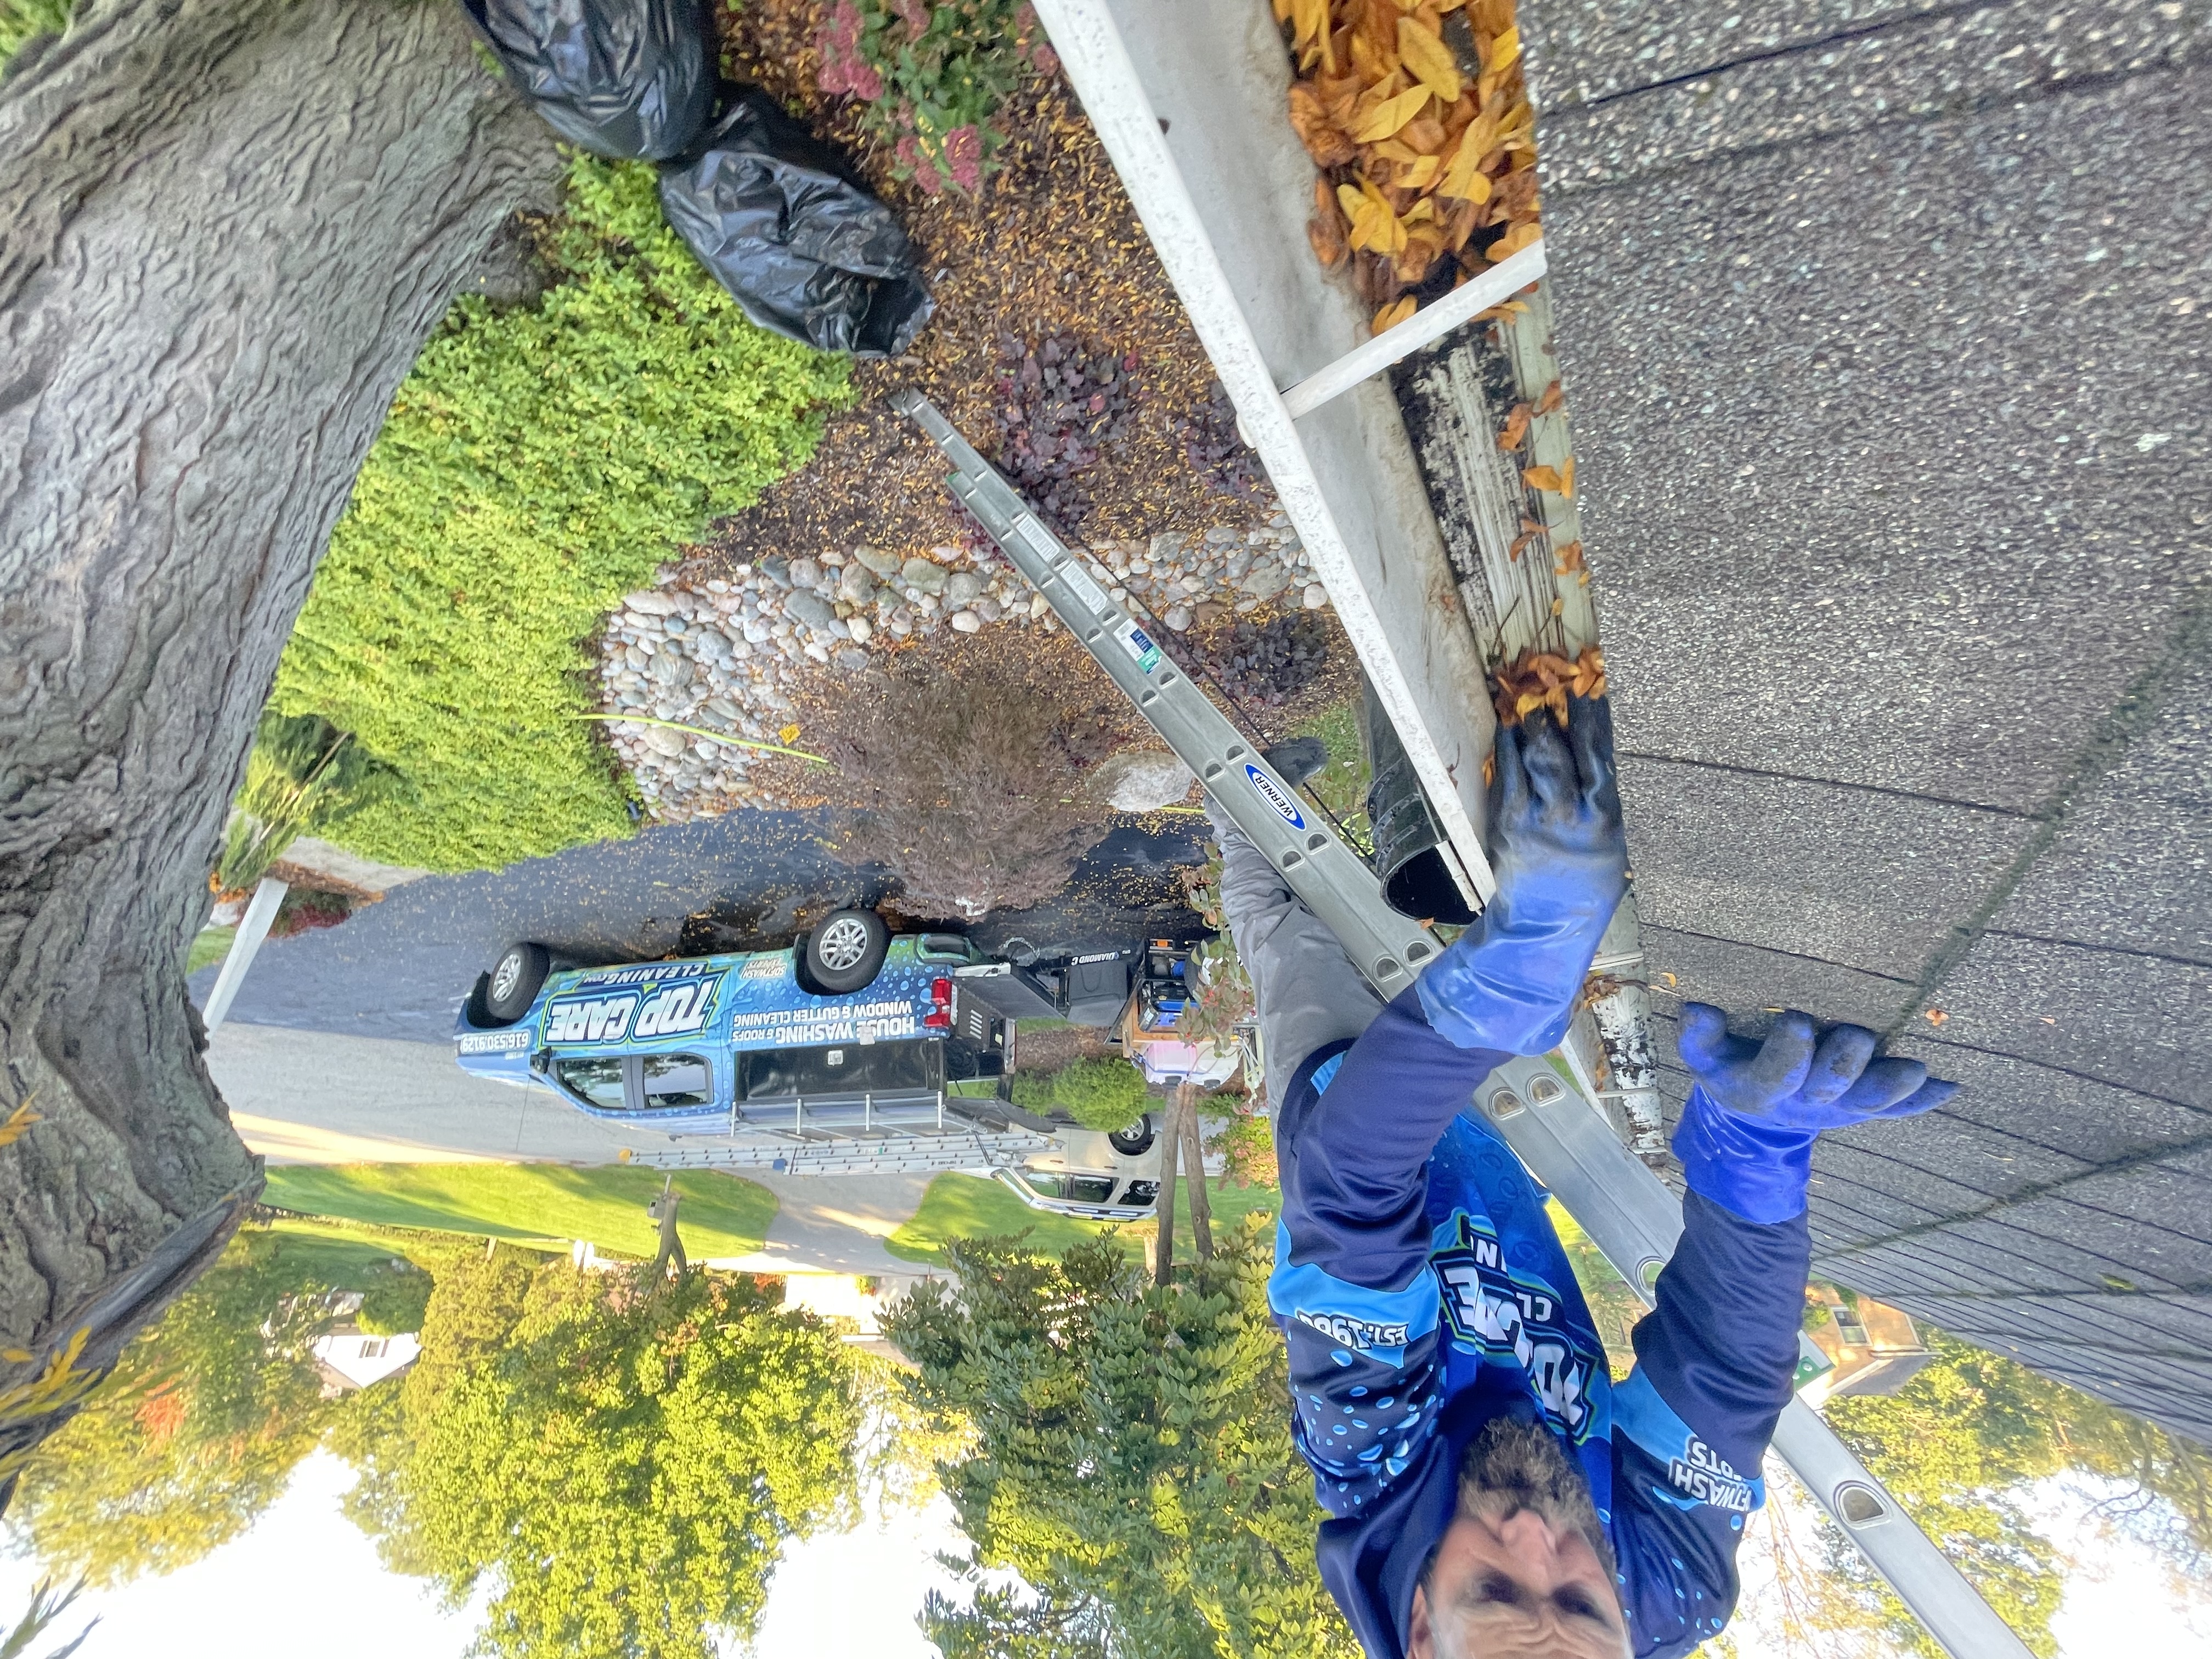 A Top Care Cleaning gutter technician on a Grand Rapids, MI job — exactly the kind of in-the-field shot that gets turned into a before-and-after photo on an iPhone before the truck leaves the driveway.
Why Doing This On iPhone — Not a Laptop — Is the Whole Point
The post-from-the-truck workflow is the reason any of this matters. If your process requires going home to a laptop, you will not post consistently. You'll intend to, but the photos will pile up in your camera roll, and the GBP algorithm will notice the silence. Consistency beats quality every single week.
For Top Care Cleaning, I run a cleaning business my dad and uncle started in Grand Rapids back in 1980, and our techs post directly from job sites. They're not carrying laptops. They finish the job, take the after photo, and need to combine it with the before photo before the next address. That's a 90-second window. The workflow has to fit in 90 seconds on an iPhone.
The platforms that matter most — Google Business Profile and Facebook — have native iPhone apps that accept photo posts directly from the camera roll. Once the combined image is saved to the camera roll, posting is three taps. That's the finish line. Everything before it is the workflow.
The Native iOS Photos Approach (Honest Assessment)
iOS gives you a few ways to combine two photos without installing anything. They work. They also have real limits that matter for service-business use. Here's the honest breakdown.
What iOS Photos Can Actually Do
The Photos app has a Markup editor — accessible from any photo via the edit icon — that lets you copy one photo and paste it as a sticker on top of another. From there, you can resize and position it so both images appear side by side. Export that, and you have a two-photo composite. Total cost: zero. Total app downloads: zero.
That's the good news. The catch is that it was never designed for this. The resulting image has uneven sizing, no clean divider, and the sticker paste doesn't constrain both photos to identical dimensions. For a personal use case, fine. For posting on a Google Business Profile where a prospective customer is deciding whether to call you, the output looks improvised.
The HEIC Format Problem
iPhone cameras shoot in HEIC format by default — a compressed image format that many web tools and email clients handle poorly. If you're uploading a before photo to a web tool and the tool shows a blank preview or fails silently, HEIC is usually why. The fix: go to Settings → Camera → Formats and switch from "High Efficiency" to "Most Compatible." Your photos will now save as standard JPEG. Make this change before your tech ever takes a before photo, not after.
Live Photos Don't Behave Like Still Photos
By default, iPhones shoot Live Photos — short video clips masquerading as still images. Live Photos have a slightly different file structure that some tools strip or convert oddly. The fix is the same: go to Camera settings and turn off Live Photos, or tap the yellow Live icon in the Camera app before each shot. A before photo should be a still. A still photo compresses smaller, uploads faster, and behaves predictably in every web tool.
iCloud Photo Library Latency
If your tech takes a photo and immediately tries to upload it to a web tool, there's occasionally a 10-30 second delay while iCloud syncs the photo. The camera roll shows the thumbnail, but the full-resolution file hasn't loaded yet. The upload will either fail or pull a compressed proxy version. The fix: wait for the little cloud icon to disappear from the photo's detail view before uploading. On a good LTE or Wi-Fi connection, this is instant. On a poor signal, it can take a minute.
The Safari + Web Tool Approach (What We Actually Use)
The better workflow for making a before and after photo on iPhone is a browser-based tool accessed via Safari. No installation, no app store updates, no "which version are you running" conversations with your techs. The tool lives at a URL. You bookmark it. Done.
The before and after photo maker on Hosted Snap is built to work on mobile Safari. The interface adjusts for phone screens. Instead of drag-and-drop (which requires a mouse), you get tap-to-upload — tapping the upload slot opens your iPhone's standard photo picker, you select your before and after, and the composite renders. Download button saves to camera roll. That's it.
Step-by-Step: iPhone Workflow
Step 1: Take the before photo. Wide shot. No artsy angle. Just the surface you're about to clean — gutters, siding, roof, driveway — from a distance that captures the whole subject. Note where you're standing.
Step 2: Do the job. Normal work.
Step 3: Return to the same spot and take the after photo. Same distance, same orientation (portrait or landscape — don't switch), same approximate time of day if you can. The viewer should be able to mentally overlay the two images. If the angle changes dramatically, the comparison reads as manipulation, not evidence.
Step 4: Open Safari on your iPhone. Go to hostedsnap.com or any honest-free web tool. Don't install a new app per job — apps update, ask for permissions, and slow your tech down. Safari is always there.
Step 5: Tap the "before" upload slot. Your photo picker opens. Select the before photo from your camera roll. Tap the "after" slot. Select the after photo. The composite previews on screen.
Step 6: Download. Tap the download button. iOS asks where to save — choose "Save to Photos." The combined image lands in your camera roll.
Step 7: Post. Open the GBP app or Facebook app. Create a new post. Select the combined image from camera roll. Add a one-line caption: service, neighborhood, one trust signal. Post. Drive to the next job.
Total time from finishing the work to having the post live: under two minutes once the habit is in place.
iPhone-Specific Gotchas Service Businesses Hit
Beyond HEIC, Live Photos, and iCloud latency, a few more iPhone quirks come up often enough to call out.
Portrait Mode and Depth Data
If your tech shoots in Portrait mode (the blurred-background effect), the resulting photo carries depth map data that some tools strip or handle strangely. The composite may show the before in Portrait and the after in standard, and the depth-blur mismatch looks odd. Train your techs to shoot in standard Photo mode, not Portrait. The before/after is about the transformation — the surface, not a blurred background.
Exporting From iOS Markup
If you've been using the Markup workaround and want to clean up the output before posting, exporting from Markup can sometimes produce a lower-resolution version than your source photos. When you tap Done in Markup, iOS gives you the option to save the edited version or revert. The edited version is the one with your Markup layers baked in. Export that. But be aware: Markup edits can reduce the effective resolution if you've zoomed, panned, or resized layers in ways that don't map cleanly to the final canvas. A web tool with a proper compositor avoids this entirely.
Horizontal vs. Vertical Orientation Mismatches
This is the most common field mistake. Tech takes the before photo in landscape (holding the phone sideways for a wide roof shot). Then, at the end of the job, takes the after photo in portrait (holding the phone normally). The before and after are now different orientations. No tool can make that composite look right. The fix is repetition: before photo, note the orientation, hold the phone the same way for the after. Some techs tape a sticky note to their truck dashboard for the first month: "Before and after — SAME ANGLE, SAME DIRECTION."
Where Before-and-After Photos Fit in the Weekly Posting Cadence
Knowing how to make before and after photo iPhone-style is half the equation. The other half is knowing when and where to post.
Google Business Profile — Weekly, Per Job
One post per job is the ceiling most service businesses should aim for — not because more is wrong, but because one per job already gives you 8-12 posts per week if you're busy. That's a healthy signal. Post frequency above that plateaus fast. One well-captioned before-and-after per job, every job, is the machine.
Facebook — Same Asset, Different Caption
The same combined image goes straight from camera roll to the Facebook app. The caption on Facebook can be a sentence or two longer than the GBP caption. Same photo, different context. No extra production time.
After-Job Customer Texts
Some of our Top Care techs text the before-and-after composite directly to the customer immediately after posting. "Here's the job we just finished for you — great to meet you today." The customer often shares it with a neighbor or posts it themselves. That's a referral channel you didn't have to build.
Neighborhood Apps and Nextdoor
Nextdoor and local Facebook groups reward authentic local content. A before-and-after of a house at a specific address in a specific neighborhood gets traction because neighbors recognize the street. The iPhone workflow makes it realistic to post these in the field, not two days later when the moment is gone.
Mistakes That Kill the iPhone Before-and-After Workflow
I've made all of these with my own techs. The mistakes are predictable.
Taking the Before on a Good Phone, After on a Bad One
If one tech takes the before and another tech does the after job visit, you might end up with different phones, different camera apps, different quality settings. The before is crisp at 12 megapixels; the after is from an older Android someone had in their pocket. The composite looks like two different jobs. Assign photo ownership at job start. One tech, one job, one consistent camera.
Forgetting the Before Photo Entirely
This is the most common failure. The tech arrives, gets focused on the job, and doesn't take the before. The after photo is beautiful. But you can't make before and after photo iPhone workflow work without both images. The fix: build the before photo into the job arrival checklist, not the job completion checklist. Before the first tool comes off the truck, phone comes out.
Using a Watermarked App From the App Store
Search "before after photo" in the App Store and you'll find apps that are free to download and have a paywall on export. Or they export with a watermark across the bottom corner. Or they ask for a $4.99/month subscription to save to camera roll. You're posting this on your Google Business Profile, the most important trust signal your local business has. Posting it with someone else's brand stamped across the corner is a watermark on your own work. Use a tool that doesn't do that.
The Freight-Train Workflow Problem
Some photo apps have the right idea but the wrong execution. You open the app. Onboarding slides appear. You're asked to create an account. You get push notification permission requests. Three popups later, you're somewhere in a feature menu looking for the "before/after" layout. Your tech is sitting in a truck that should be at the next job. That's a freight train to deliver a photo that should take 60 seconds. Simple beats powerful, every time, in a field workflow.
The before and after picture maker vs. iPhone-Native Tools
One question I hear from service-business owners: "Why not just use the combine images iPhone tool or a dedicated app?" The honest answer is that dedicated apps are fine when they're honest-free and lightweight. The problem is that most of them aren't. A browser-based tool accessed through Safari has zero install friction, works across every iPhone your team carries, and doesn't require you to troubleshoot "why isn't the app working" with a tech who's already behind schedule.
The web approach also means your workflow doesn't break when iOS updates. Native apps that relied on certain photo permissions or camera access APIs have broken with major iOS updates before. A Safari-based tool has no iOS version dependency. The browser is the browser.
FAQ
Does the iOS Photos app have a built-in before-and-after feature?
No. iOS Photos has a Markup editor that can paste one photo on top of another, but there's no dedicated side-by-side before-and-after layout. The output requires manual positioning and looks unpolished for professional posts. A web-based tool handles this in one step.
What's the best free app for before and after photos on iPhone?
The most reliable approach isn't an app — it's a browser-based tool accessed via Safari. Browser tools work on every iPhone regardless of iOS version, require no installation, and don't break with app updates. Hosted Snap is designed for exactly this mobile workflow.
How do I change my iPhone from HEIC to JPEG for before-and-after photos?
Go to Settings → Camera → Formats and select "Most Compatible." Your camera will now save photos as JPEG instead of HEIC. This improves compatibility with every web-based upload tool. Do this before your first field shoot.
Can I post a before-and-after photo directly to Google Business Profile from my iPhone?
Yes. Save the combined image to your camera roll, open the Google Business Profile app, create a new post, and select the combined image. The GBP app is available on iPhone and posts publish within a few minutes. This is the end-to-end in-the-field workflow.
My tech forgot to take the before photo. Is there anything I can do?
Not really — the before photo has to exist to make a before-and-after composite. This is the most common workflow failure for service businesses. Build the before photo into your job arrival protocol: before any tool comes off the truck, the tech takes the wide-angle before shot. Some teams use a job checklist on a printed card in the truck.
Why does my before-and-after look blurry on Instagram after I export it?
Most likely the export was downsampled. Some tools reduce resolution on the free tier to push users toward a paid tier. Check that your tool is exporting at the source photo's native resolution. iPhone photos from a modern camera are 12 megapixels or higher — the export should be close to that, not 720p. If your tool is downsampling, switch to one that doesn't.
Does Hosted Snap work on iPhone Safari?
Yes. Hosted Snap is browser-based and mobile-responsive. Tap the upload slots to open the iPhone photo picker, select your before and after, preview the composite, and download. No app install, no account creation. The workflow is the same whether you're on a desktop or an iPhone in a client's driveway.
Do I need a Wi-Fi connection to make a before-and-after photo on iPhone?
You need a data connection to load the web tool and upload your photos. LTE is fine — most modern iPhones on a standard carrier plan upload a typical JPEG composite in under five seconds on LTE. If you're in a low-signal area, wait until you're back on the road before opening the tool.
I Built Hosted Snap Because the Truck Workflow Was Broken
Four years ago my techs were trying to post before-and-afters and abandoning the habit because the tools didn't fit the workflow. App installs. Signup walls. Watermarks. Deceptive UIs where the composite looked fine until you tried to export and got hit with an "upgrade to remove watermark" screen. The whole system was priced for influencers who make money from photos, not contractors who make money from clean gutters.
I built Hosted Snap to fix the one specific pain point: you need to know how to make before and after photo iPhone-compatible, in the field, in under two minutes, without paying monthly subscription fees for a tool you use for 90 seconds a day. It works in Safari on iPhone. No signup. No watermark. No influencer-tier subscription. The combined image downloads straight to your camera roll and goes to GBP before you start the truck.
The math is simple. One before-and-after post per job. Ten jobs a week. Fifty weeks a year. Five hundred Google Business Profile posts showing real transformations at real addresses in your service area. That's the compound effect that wins local search over 18 months. The tool just has to not get in the way.
About Alex Host
I'm Alex Host. I run marketing for Top Care Cleaning — my family's pressure-washing and exterior-cleaning business in Grand Rapids, Michigan, started by my dad and uncle in 1980. Four hundred-plus Google reviews. Forty-five years of customer work.
Alongside Top Care, I build software at Hosted Brands — the parent company behind Hosted Snap (the free tool you're reading about), Hosted Reviews, Hosted Proof, and the rest of the Hosted Stack. Everything I build is the tool I wished I'd had at Top Care five years ago.
Hosted Snap is free forever. No signup. No watermark. No upsell. It exists because my own techs needed a dead-simple way to make before and after photo on iPhone from the job site — and every other tool in the category made that 60-second job take 12 minutes.