Combine Images on iPhone: A Service Business Owner's Field Guide
Every time I finish a roof cleaning job, I need to combine images on iPhone before I drive home. Before and after, same angle, one frame, posted to Google Business Profile while I'm still in the driveway. That's the whole job. I've tried every native iPhone trick, every free app the App Store serves up, every browser tool that promises a one-tap combine and then asks for my email address. Most of them eat five minutes I don't have. So I built something that doesn't. This is everything I know about doing this from a job site.
What does "combine images on iPhone" actually mean?
To combine images on iPhone means joining two separate photos into a single image file — most commonly a before-and-after — directly from your phone without a desktop or design suite. The result is one exportable image you can post to Google Business Profile, Instagram, or a quote email in seconds. Done right, the whole process runs under 60 seconds from camera roll to posted.
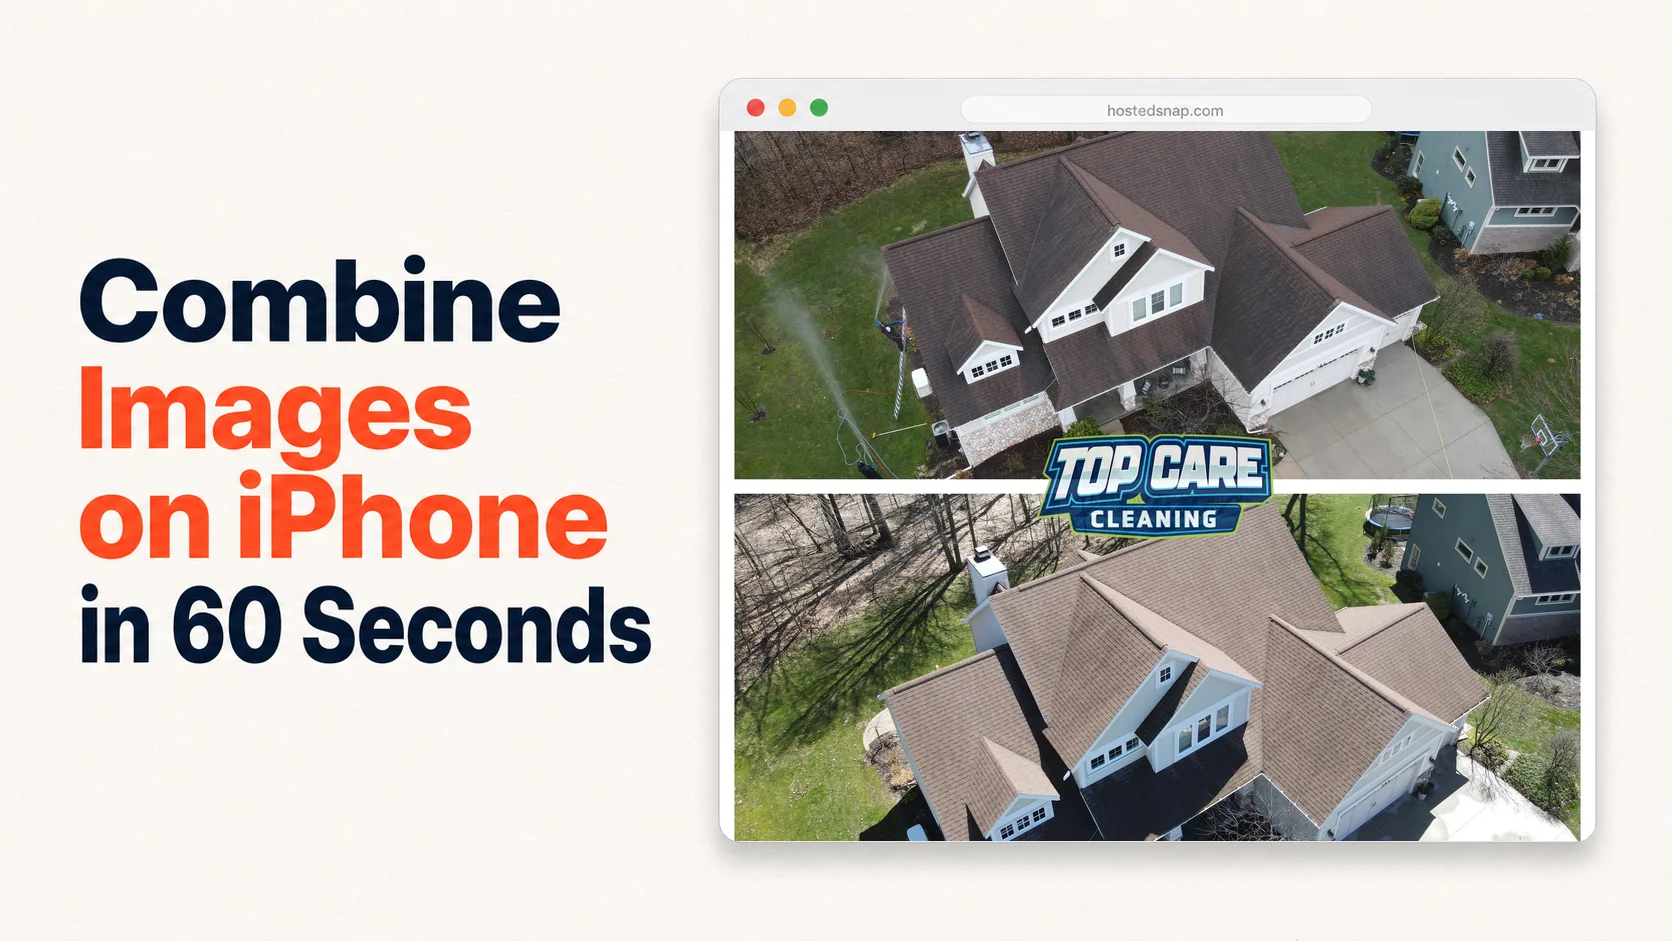
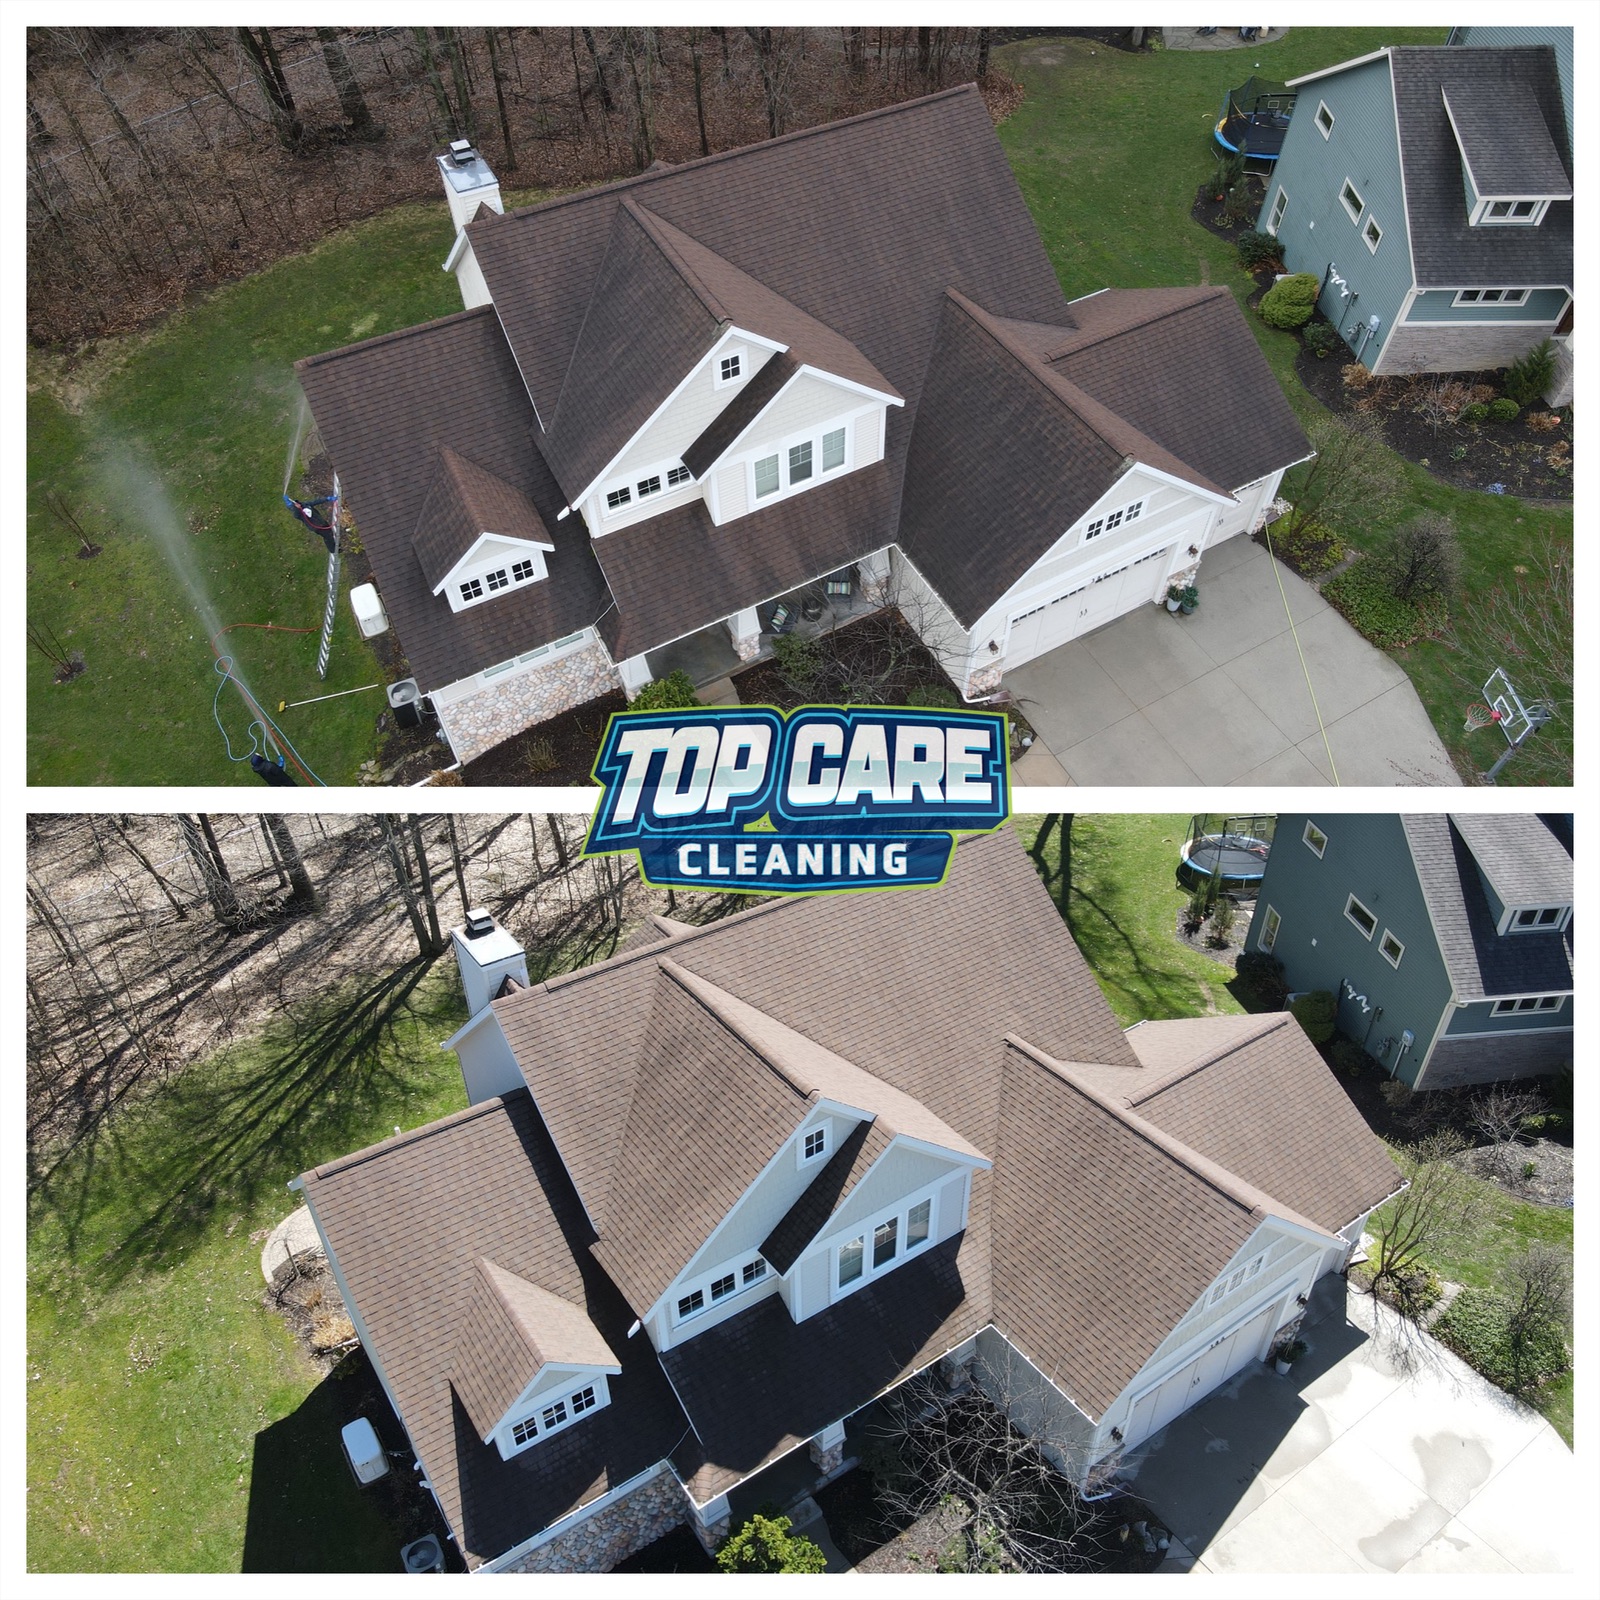 Roof cleaning before and after from Top Care Cleaning (Grand Rapids, MI) — made on Alex's iPhone in 60 seconds while still on the job site, posted to Google Business Profile before he packed up the truck.
The 3 native iPhone ways to combine images (and why they all fall short)
There are exactly three native paths on an iPhone that get you close to a combined image. None of them reliably deliver a clean, shareable before-and-after in under 60 seconds. Here's the honest walkthrough.
Native Markup inside Photos
Open a photo in the Photos app, tap Edit, tap the markup icon (the pen at the top right), and you can technically paste a second image over the first. You insert the second photo as a sticker from the photo library, resize it, and drag it into position.
The result is not a side-by-side combine. It's a photo with a second photo overlaid on top of it. Getting both images to sit cleanly at half-width, aligned, with no awkward white gaps, is a manual drag-and-pinch nightmare on a 6-inch screen with dirty gloves on. I've done it maybe twice in four years. Both times I deleted the result.
Notes app workaround
Open Apple Notes, create a new note, tap the camera icon, insert your first photo, insert your second photo. Now tap the share icon and screenshot the note. Trim the screenshot, crop out the Notes UI chrome, and post what's left.
The output quality is whatever your screenshot resolution is — not the original photo resolution. You also get Notes app metadata embedded in the visual if your crop is off by a pixel. This is a workaround three degrees of separation from the actual job. Hard pass.
Shortcuts app
The most technically capable native option. Apple Shortcuts has image-manipulation actions. You can build a shortcut that takes two photos from your library and combines them side by side into one output file.
Building that shortcut takes 20 minutes if you know what you're doing. If you don't, it's a YouTube tutorial and a debugging session. And the layout logic in Shortcuts is basic — you're hand-coding pixel offsets to get the divider in the right place. Once it's built it works, and it respects your original resolution. But it's a software project, not a 60-second phone workflow. Most service-business owners won't build it. I understand why.
Third-party iPhone apps that combine images (and the influencer-pricing trap)
The App Store has dozens of apps built around the "combine photos" query. Here's the pattern I kept running into, and why I stopped looking after the fourth or fifth app.
The free-to-download, watermark-on-export trap
Download the app, open it, pick two photos, tap combine. Looks good. Tap export. There's a watermark across the center with the app's name. Pay $6.99/week to remove the watermark on your own photo.
This is the freight-train to deliver a pizza. You needed a combined image. You got a subscription to an app you'll use twice a month, with a $6.99/week paywall on the output of your own work. That's $363/year to combine before-and-after photos on your iPhone. For a roof-cleaning company posting eight times a month, that math doesn't work.
The free tier that's really a demo
A second pattern: the free tier gives you three exports per month. After that, you're on the paid plan at $9.99/month or $79.99/year. Three exports per month is enough to evaluate the tool. It's not enough to run a weekly GBP posting schedule.
The design-suite-that-happens-to-combine-photos
Open the app. You're greeted with template categories: Birthday Card, Instagram Story, Facebook Banner, Real Estate Flyer, Wedding Invitation. Scroll to find "Before & After" or "Side by Side." It's in there somewhere, four menus deep, behind the templates built for graphic designers.
These tools earn their monthly fee for design professionals. For a service-business owner on a job site who needs to combine two photos and post them, the feature-to-task ratio is completely inverted. You're a plumber who only needs a wrench, and they've handed you a full shop.
The one App Store pattern that actually works
A small number of apps do the single-purpose job honestly: two upload slots, one combine action, clean export at native resolution, no watermark. They exist. They're just hard to find because the App Store algorithm buries them under the design suites with bigger marketing budgets.
If you find one, test it: does it export at your original photo resolution? Is the download button as prominent as any "Upgrade" button? Does the output have a watermark? Three yeses and two nos and you've found a usable app.
The browser-based way (what I do on every job site)
This is the path I actually run. No App Store. No install. No update notifications appearing at 7am when I'm trying to post before a job.
Open Safari on your iPhone. Go to the tool. Two upload slots appear. Pick your before photo from your camera roll. Pick your after photo. Choose vertical split or horizontal stack. Tap download. The image saves to your Photos app. Open GBP, post the image.
That's it. The whole path from Safari open to photo saved runs about 45 seconds once you've done it a few times.
The mobile-browser path has one real advantage over native apps: no install friction, no permission requests, no updates breaking the workflow. The tool is the same on your iPhone as it is on your desktop. Your crew members can use the same URL without you setting up their phones.
It also fits how you're actually working on a job site. You're not in the App Store comparing ratings at 3pm. You have your phone out to take the after photo, and then you need the combine done before you put the phone away. Browser-based is the path of least resistance.
For the cross-platform comparison, the approach is the same whether you're on iOS or Android — how to combine photos android covers the Android side if you or your crew are on mixed devices.
How to combine images on iPhone in 60 seconds (the workflow I use after every job)
This is the exact sequence I run after a roof cleaning. Same workflow applies to any service.
Step 1: Take the after photo before you move anything
Most service-business photo fails happen here. You finish the job, pack up the gear, move the truck, and then take the after. Now the truck is in the frame where it wasn't in the before. The shadows are different. The angle is three feet to the left.
Take the after photo from the same spot, same height, same orientation as your before. I keep the before photo open on my phone while I walk back to the shooting position. I hold the phone up and match the frame before I tap.
Step 2: Open your combine tool in Safari
I have the URL bookmarked in Safari. Two taps and I'm at the upload screen. No login, no dashboard, no choosing a workspace. Just the two upload slots.
Step 3: Upload before (left) and after (right)
Tap the left slot, choose photo from library, select the before. Tap the right slot, select the after. The preview renders immediately.
Step 4: Choose your layout
Vertical split for tall subjects — house fronts, fence lines, entry doors. Horizontal stack for wide subjects — long driveways, roof lines shot from across the street. Ninety percent of my roof and house washing jobs are vertical split.
Step 5: Download
Tap download. The image saves to Photos. Native resolution, no watermark.
Step 6: Post before you leave the driveway
Open Google Business Profile. New post. Attach the combined image. Caption: service type, neighborhood, one technical detail, one trust signal. Publish.
I'm posted before I start the truck. The post is timestamped from the job address, which the GBP algorithm treats as a local relevance signal. That's not a guarantee — it's a pattern I've noticed over four years and 400+ reviews.
The full combine two photos side by side guide covers layout choices and output formats in more detail if you want the deeper technical breakdown.
Service business iPhone photo cadence — what I actually do
The combine workflow only pays off if you're running it consistently. Here's how I think about the cadence.
Before photo protocol
Every job gets a before photo before any work starts. This is not optional. The before is the left half of every future before-and-after you'll ever post about this address. Miss the before and the after is useless for combining.
I keep a folder in my Photos app called "Befores" and drop every pre-job shot in there. After the job posts, I archive the pair. The folder never gets big.
Weekly GBP post
One combined image per week on Google Business Profile. Tuesday morning, before the first job. I pull from the previous week's jobs — whatever had the most dramatic transformation or the best matching angles.
Consistency matters more than volume here. One post per week, every week, builds more GBP momentum than three posts one week and none the next two.
Monthly Instagram run
At the end of each month I pick the four best before-and-afters and schedule them on Instagram as a grid series. Same images I already made for GBP. No additional production work.
One combine workflow feeds three platforms: GBP weekly, Instagram monthly, and the occasional quote email where I include recent jobs near the prospect's address. The photo combine is the asset. Everything else is distribution.
The quote email use case
When we send a roofing or house-wash quote, I attach two or three combined images of recent jobs in the same neighborhood. The prospect sees the actual result we produced four blocks from their house.
Close rate on quotes with photo evidence runs higher than quotes without — not a scientific study, just four years of attention to which quotes convert. The put two pictures together iphone workflow is exactly the same for quote attachments as it is for social posts.
FAQ
Can I combine images on iPhone without downloading an app?
Yes. A browser-based tool in Safari works without any App Store install. Open the tool, upload two photos from your camera roll, download the combined image to Photos. No app required.
Does iPhone have a built-in way to combine two photos?
Not a clean one. The Markup tool inside Photos lets you overlay a second image as a sticker, but it doesn't produce a proper side-by-side. The Notes workaround and Shortcuts app are functional but require more setup than they're worth for a 60-second job.
What's the fastest way to do this for Google Business Profile?
A browser-based combine tool with mobile-first design. Two upload slots visible on load, vertical-split or horizontal-stack layout choice, one-tap download to Photos. The whole path runs under 60 seconds. Open Safari, go to the tool, upload, download, post.
Will the combined image lose quality?
It depends on the tool. Tools that export at native resolution preserve your original photo quality. Tools that downsample to a fixed pixel width (common in free tiers that upsell resolution) will reduce quality. Check your export file size — if the combined image is smaller than either source photo, the tool is downsampling.
Is there a free way to combine photos on iPhone without a watermark?
Yes. Honest-free browser-based tools exist that export clean images without a watermark and without an influencer-tier subscription. Test any tool by running a combine and checking the download — if there's a watermark on your own photo, move on.
How do I combine a before and after photo on iPhone for a service business post?
Take the before before work starts, same angle as you plan to shoot the after. After the job, return to the same position and shoot the after. Open a combine tool in Safari, upload before left and after right, choose vertical split for tall subjects, download. Post to GBP from the job site before you leave.
What aspect ratio works best for Instagram?
For Instagram feed, 1:1 (square) or 4:5 (portrait) are optimal. If your combine tool exports at the native aspect ratio of your source photos and your photos are 4:3 landscape, crop to 4:5 inside Instagram on upload. For GBP, native ratio is fine — GBP doesn't force square.
Can I add "Before" and "After" labels to the combined image?
Some tools support small text labels. If yours does, place them in the top corners, small, low-contrast — they shouldn't dominate the image. For strong transformations (dark roof algae to clean roof), labels are optional. For subtle jobs, a small label helps the viewer orient quickly.
I Built Hosted Snap Because My iPhone Shouldn't Need a $14.99/mo App
I was spending $4,000 a month on Google Ads for Top Care Cleaning and $14.99 a month on a design app that took 12 minutes to produce one before-and-after. Forty-six years of family business and I was paying influencer-tool prices to combine two photos of a roof.
The math was wrong. The tools weren't built for us. They were built for graphic designers, social media managers, and influencers who need a full design suite. I needed to combine images on iPhone in under 60 seconds while still wearing gloves on a job site.
So I built Hosted Snap — a free two-photo combiner that opens straight to two upload slots and gets out of your way. No design templates, no subscription tiers, no watermark on your own work, no pricing designed for someone who bills $10,000 per post.
Honest pricing. That's it. The combine two photos into one tool covers the broader combine workflow if you want the desktop version. The iPhone path is exactly what I described in this guide.
About Alex Host
I'm Alex Host. I run Top Care Cleaning in Grand Rapids, MI — a family cleaning business my dad and uncle started in 1980. I work there with my brother. We do house washing, gutter cleaning, roof cleaning, window cleaning, carpet cleaning, and Christmas light installation. 400+ Google reviews. Forty-six years of family operation.
I also build SaaS tools for local service businesses — the kind of tools I wish existed when I was paying $4,000/month in Google Ads and getting nickel-and-dimed by every "free" app in my workflow. The whole portfolio lives at hostedbrands.com. Hosted Snap is the first free tool in the stack. There will be more.
If you're a service-business owner who's tired of paying influencer prices for tools you only use twice a week, I built the stack for us. The free tools are honest about being free. The paid stuff is honest about being paid.