Combine Photos Online: The Free Tool a Service Business Owner Built So You Stop Paying $14.99 a Month
Every time I needed to combine photos online for Top Care Cleaning, I'd land on a site that either slapped a watermark on my before-and-after or hit me with a $14.99/month paywall to download my own photo. I run a house-washing business. I needed to combine two job photos twice a week. That's it. I wasn't producing agency work. I wasn't building a brand kit. I just needed a clean before-and-after of a tan house I soft-washed on Saturday morning. I paid for too many subscriptions before I stopped and built the thing myself.
What is combining photos online?
Combining photos online means using a browser-based tool to merge two or more images into a single output file — no software installation, no design app, no desktop export. For service businesses, the main use case is a before-and-after: two photos joined side by side or stacked top-to-bottom, ready to post on Google Business Profile, Instagram, or a quote follow-up email. The whole job should take under 60 seconds.
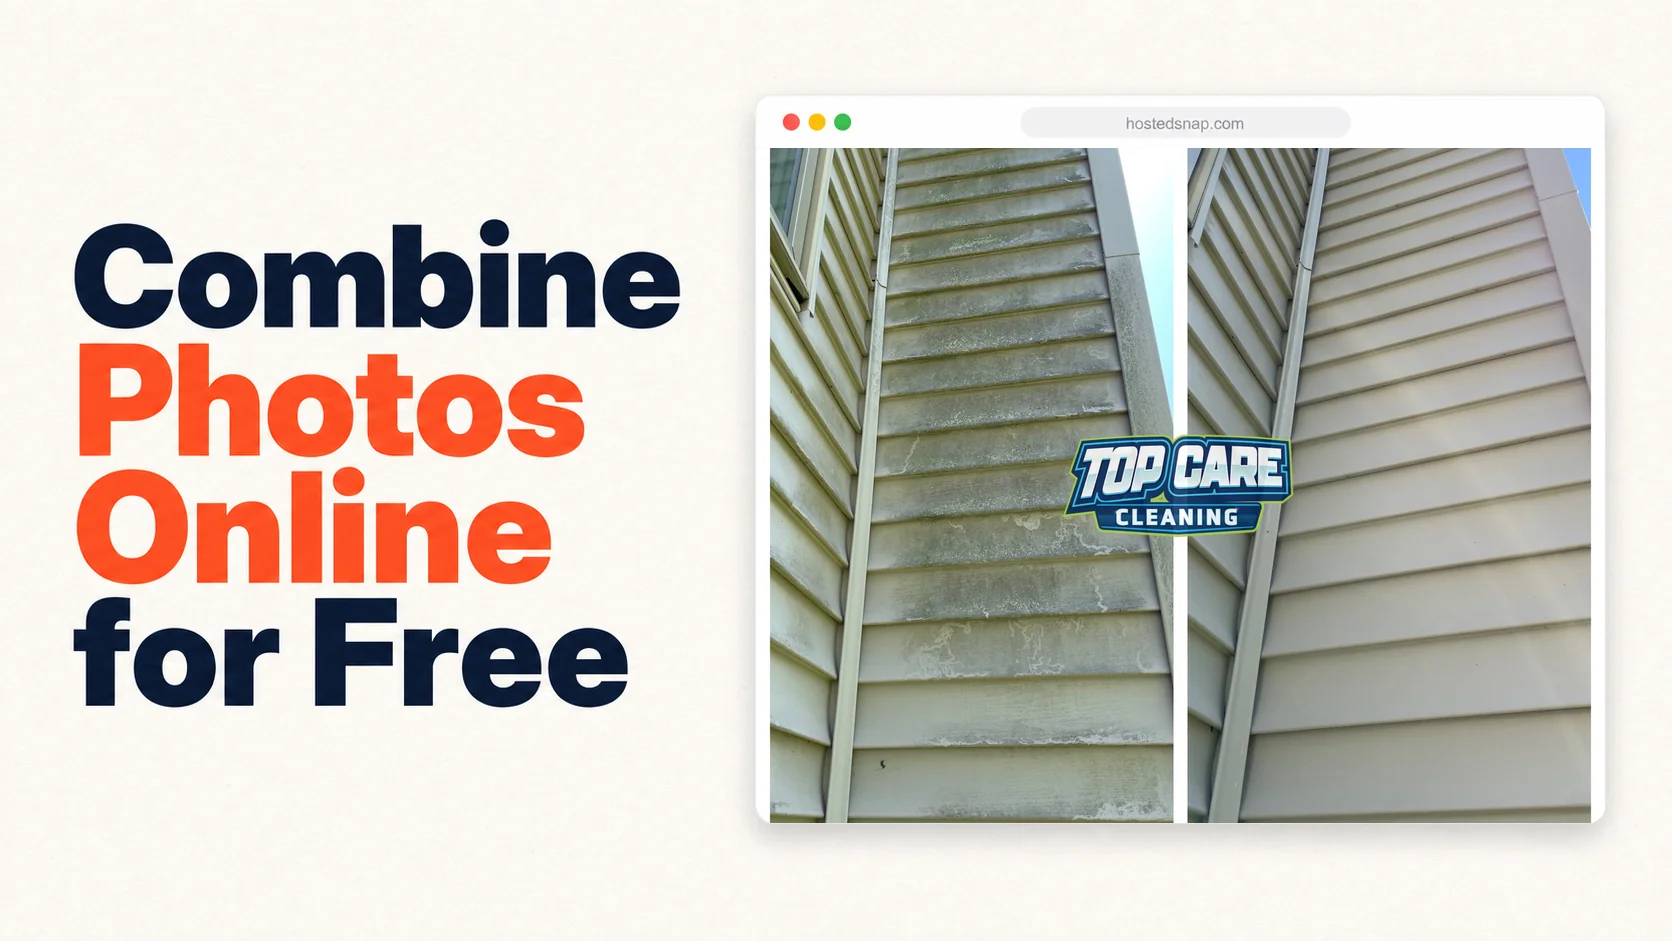
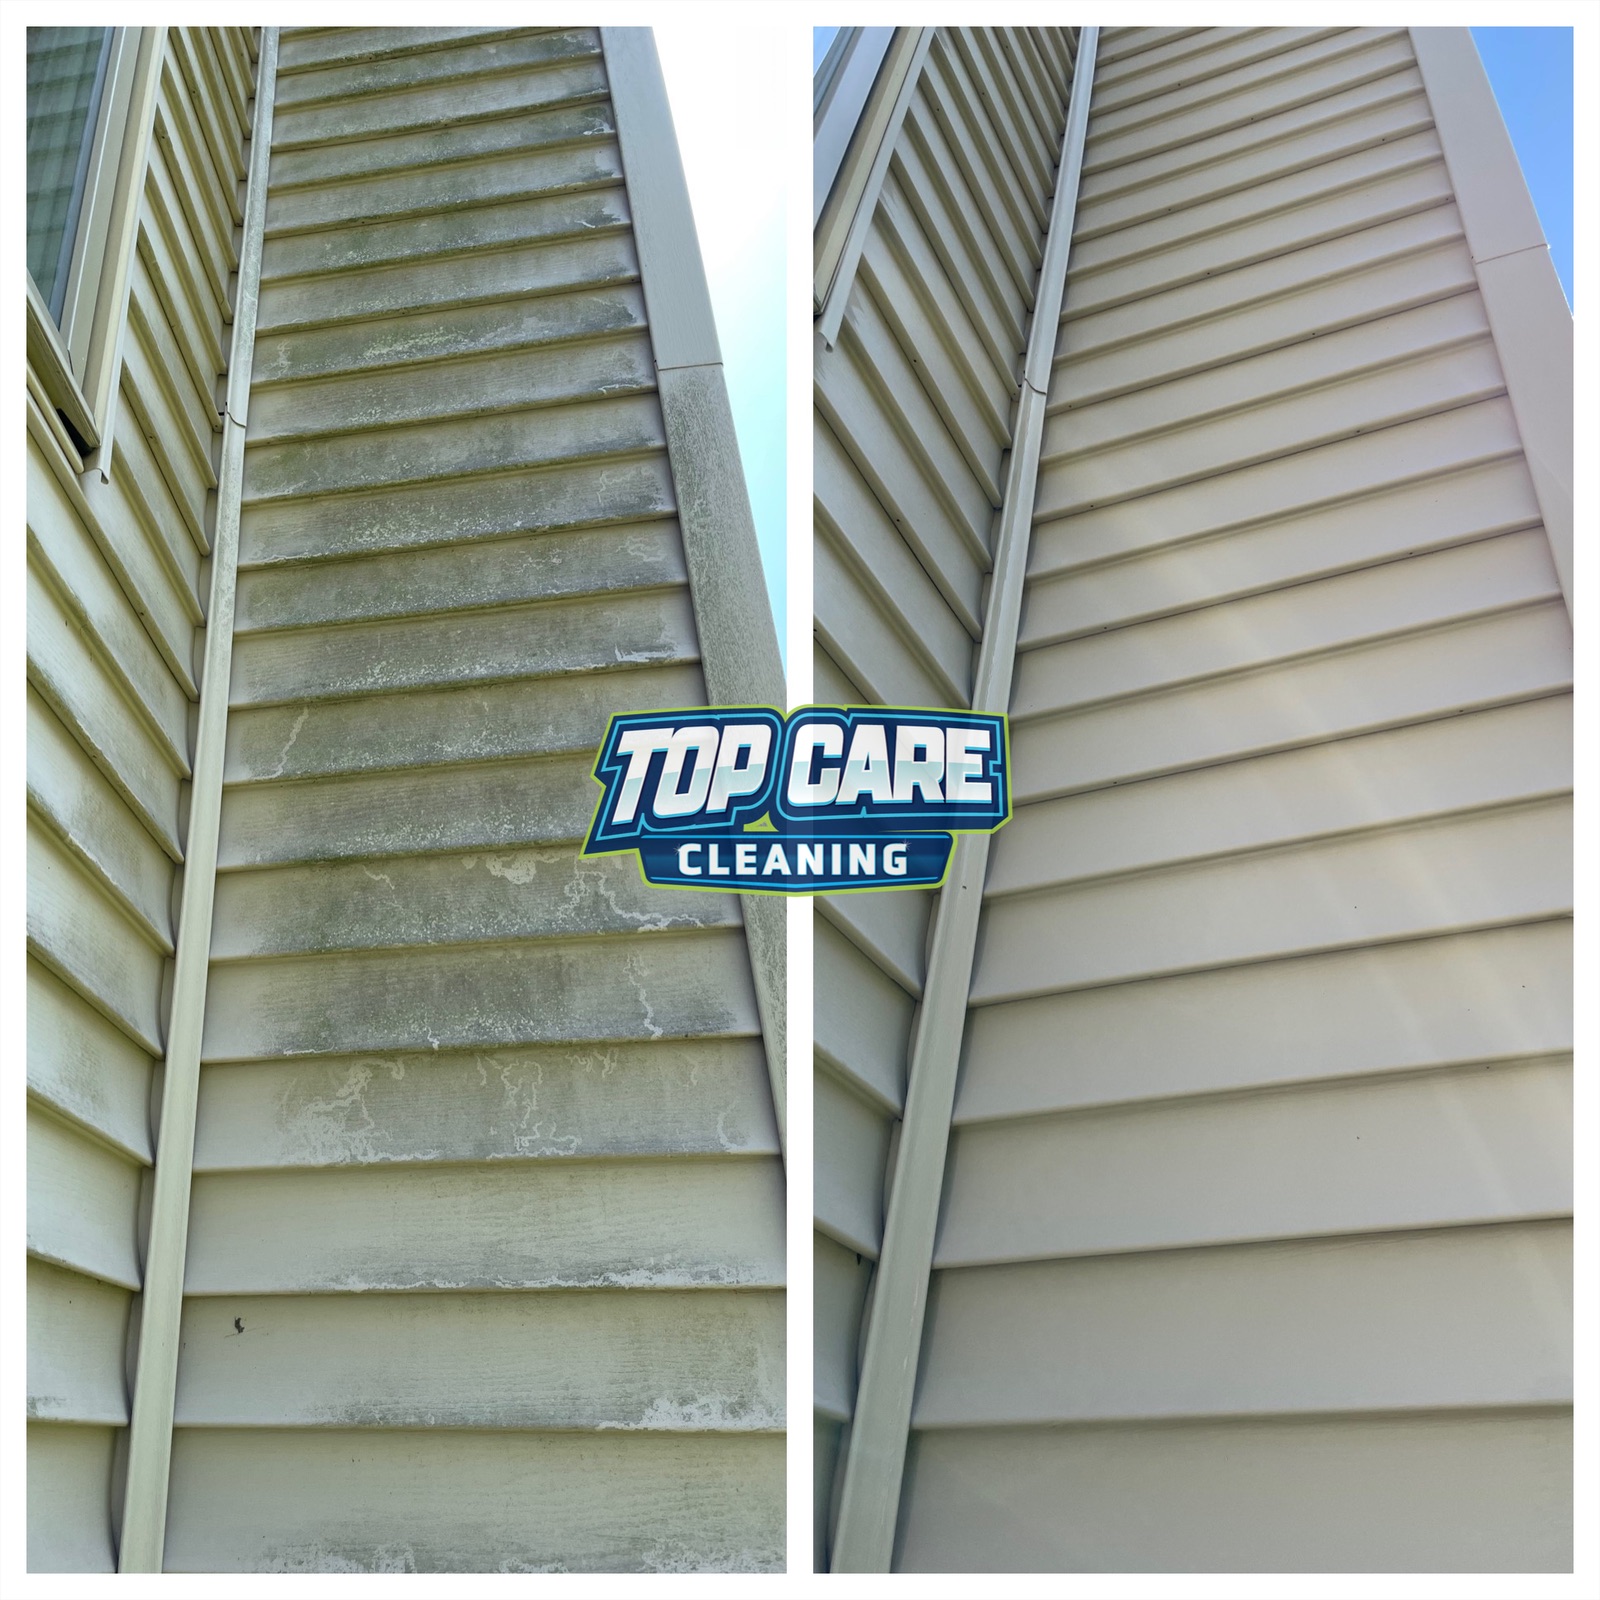 Real before-and-after from Top Care Cleaning (Grand Rapids, MI) — a tan house soft-wash, dingy siding on the left, bright clean siding on the right. This is the exact kind of combined photo a residential exterior cleaner posts after every Saturday job.
Why service businesses combine photos online (not just Photoshop them locally)
Desktop software is the wrong tool for this job. Let me explain why I came to that conclusion after years of trying both.
Photoshop can combine two photos. So can a dozen desktop apps. But they all carry the same tax: install time, load time, file management, and a learning curve that doesn't shrink just because you use the tool twice a week. A local service business owner producing 8–10 before-and-afters a week needs a 60-second process, not a 10-minute one.
Browser-based tools solve the installation problem. Every device with a browser can run them — your work laptop, your phone in a truck cab, your front-office computer that never gets new software installed. No update prompts. No license keys. No \"subscription has expired\" popup when you're trying to post a job photo at 7am.
The other case for browser-based is handoff. If you have a crew member or a front-office person posting your GBP photos, you're not installing Photoshop on their machine. You're giving them a URL. An online photo combiner with a simple two-upload interface is something a new hire can use on day one without training.
The business case is time. Top Care runs 400+ jobs a year. If I'm spending 12 minutes per before-and-after, that's 80 hours a year on photo editing. If I cut that to 60 seconds per photo, it's under 7 hours. That gap is real work — estimates, job walks, customer calls. It matters.
The 4 patterns of combine-photos-online tools (and which ones are honest)
Not all online photo combiners are equal. After testing more of them than I'd like to admit, every one falls into one of four patterns. Three of the four patterns are, in some way, dishonest. Here's the taxonomy.
Pattern 1: The Watermark Pattern
The tool works. It combines your two photos. The export looks correct. Then you download it and there's a logo burned into the center of your before-and-after.
This is a bait-and-switch. The watermark isn't a feature — it's a permanent advertisement for the tool stamped on your work. Pay $14.99/month to remove it. I've seen this framed as \"free with Pro upgrade available.\" It's not free. It's free with conditions that make the output unusable for professional posting.
A house washing company posting a watermarked before-and-after to their Google Business Profile looks like they couldn't afford to remove the stamp from their own photo. That impression costs more than $14.99/month in lost trust.
Pattern 2: The Signup Wall Pattern
The tool appears free. You upload your two photos. You click download. Account required. The email capture is the product. Your before-and-after is the bait.
Some tools gate behind signup and still watermark after you've created an account. Double wall. The signup isn't terrible by itself — but when the only thing you needed was one download and you end up on a marketing list for a design tool you'll never use, the cost-to-value math breaks down fast.
Pattern 3: The Freight-Train Pattern
You searched for a simple way to combine photos online. You landed on a full design suite with templates, brand kits, animation tools, a stock photo library, and a \"combine photos\" feature buried five menus deep. The combine feature works fine. The tool is just overkill for the job.
This is the \"freight train to deliver a pizza\" pattern. The engineering is real, the pricing reflects the full feature set, and if you need a full design suite, this is legitimate. But if you only need to combine two photos, you're paying — in time and money — for a thousand features you'll never touch.
Pattern 4: The Honest-Free Pattern
The tool opens to two upload slots. You drop in your photos. You pick a layout. You download. No watermark. No signup required before you get your file. Honest pricing — including free where it claims free.
This is the right pattern. It exists. Hosted Snap is built on it. The test is simple: can you download your combined photo without creating an account, without a watermark, and without being upsold before you leave the page? If yes, it's an honest-free tool.
How to combine two photos online in 60 seconds
This is the exact workflow I run for Top Care's weekly GBP posts. I've done this hundreds of times. The steps don't change.
- Find your two photos. Pull the before and after from your camera roll, Dropbox, or Google Drive. Make sure both are the same orientation — both landscape or both portrait. If one is rotated wrong, fix it in your phone's photo app before uploading. Don't try to rotate inside a combining tool; most handle it poorly.
- Open a browser-based combining tool. Go directly to the combine-photos interface, not a homepage with a menu system. The upload slots should be the first thing you see. If you're looking for a combine two photos into one tool that starts on the task, that's the right instinct.
- Upload your before and after. Left slot gets the before. Right slot gets the after. For a vertical-split layout, before on the left is the convention — it reads left-to-right the same way a sentence does. Don't flip it.
- Pick your layout. Vertical split (side by side) for tall subjects — houses, fences, windows. Horizontal stack (top and bottom) for wide subjects — driveways, rooflines, long fence lines. When in doubt, vertical split works on every phone screen.
- Set the divider. Thin is better. A 3–5px divider is enough to visually separate the two photos without dominating the frame. A thick 30px divider signals \"template\" to the viewer's eye. Keep it subtle.
- Download at native resolution. The exported file should be at the full resolution of your source photos. If the download is noticeably smaller than your originals, the tool is downsampling — usually to force a Pro upgrade for full-res export. Move to a different tool.
- Post it. Google Business Profile, Instagram, Facebook, quote email — wherever the before-and-after earns its keep. The file is ready. Total time from opening the tool to downloaded file: under 60 seconds once you've done it twice.
The 5 mistakes service businesses make when combining photos online
I've made all of these. Some of them cost me real engagement on posts that should have performed well.
Mistake 1: Wrong aspect ratio on export
Most online photo combiners default to 1:1 square output because square is the Instagram grid standard. If your source photos are 4:3 (most phone cameras), the tool will crop both photos to force them into a square. You lose the edges — sometimes the exact edges that showed the full house was clean.
The fix: before you export, check whether the tool has an aspect ratio setting. Choose \"native\" or \"match source photos\" if it exists. If the tool only exports square and your subject needs the full width, use a different tool or shoot your source photos in 1:1 to begin with.
Mistake 2: Mismatched lighting between photos
The before is shot at 8am with soft morning light. The after is shot at 2pm with direct overhead sun. The tan siding looks brighter in the after — partly because it's clean, partly because the lighting is completely different. The viewer's eye picks this up subconsciously and reads it as manipulation, even if the cleaning was real and dramatic.
The fix: shoot your before and after in the same lighting block when possible. Both overcast, or both in the same part of the day. If you're pulling old job photos for a portfolio, pick pairs where the lighting is similar enough that the transformation is the dominant difference.
Mistake 3: Before and after sides flipped
Before on the right, after on the left. It happens more than you'd think — upload order gets mixed up, the tool doesn't label the slots clearly, and the photo goes out with the wrong read direction. A viewer who looks twice notices. A viewer on Google Business Profile who glances once sees a \"clean to dirty\" post and moves on.
The fix: confirm before-left, after-right before every export. Takes two seconds. Make it a habit.
Mistake 4: Divider too thick
A thick divider turns your before-and-after into a template. It signals \"made on a free online tool\" more than any watermark does. Thick dividers draw the eye to the seam instead of the transformation.
Keep the divider thin — 3 to 5 pixels. Or use no divider at all if the two photos have enough natural contrast at the join point. For a tan house wash where the before is dingy beige and the after is bright tan, the color shift at the seam IS the divider.
Mistake 5: Compressing the output before uploading
You combine the photos, download the file, then run it through a compression tool because you've heard file size matters for load speed. The result is a pixelated before-and-after on Google Business Profile that looks like a screenshot of a screenshot.
Google Business Profile accepts JPEG and PNG files up to 5MB and handles its own compression on the server side. Upload the full-resolution output from your combining tool. Let Google compress it for display. Your source file should be full resolution. The viewer sees the best quality the platform allows.
FAQ
What does "combine photos online" actually mean?
It means using a web browser — not installed software — to merge two images into one output file. You upload your photos, pick a layout, and download the combined result. No Photoshop, no app install, no design experience needed.
Is it free to combine photos online?
It depends on the tool. Honest-free tools give you a full-resolution, watermark-free download without requiring a paid subscription. Watermark-pattern tools give you a "free" download with a logo burned into your photo. Signup-wall tools require an account before you can download. Read the pattern section above to know which kind you're using before you invest time in an upload.
What's the best layout for combining two photos?
Vertical split (side by side) for tall subjects — houses, people, windows, doors. Horizontal stack (top and bottom) for wide subjects — driveways, rooflines, long surfaces. Both work on all platforms. The right choice is whichever layout shows the full subject without cropping the meaningful parts.
Can I do this on my phone?
Yes. Any browser-based tool works on a phone browser — Safari, Chrome, wherever. You don't need a native app. The workflow is the same: open the tool in your browser, upload from your camera roll, pick a layout, download. If the tool's mobile UI is broken or redirects you to an app download, close it and use a different tool.
How do I get a watermark-free result?
Use a tool that doesn't add watermarks. The honest-free tools in the space — including merge photos online free tools that are genuinely free — export clean files without burned-in branding. If you're unsure, do a test export before building a workflow around a tool. If a watermark appears, it's not the tool for you.
What file format should I download?
JPEG for photos — it's the standard for camera roll images and handles compression efficiently. PNG if your photo has a transparent background (rare for before-and-afters but possible for product shots). WebP if the tool supports it and your destination platform accepts it. For Google Business Profile and Instagram, JPEG is the safe default.
Do I need to resize my photos before combining them?
Only if the two photos are dramatically different dimensions. Most online combining tools handle minor dimension differences automatically by scaling the smaller photo to match the larger one. If your before photo is a 12MP camera shot and your after is a 2MP screenshot, the tool will upscale one or downscale the other — and the result will look inconsistent. Shoot both photos at the same resolution when possible.
How many photos can I combine at once?
Most tools designed for before-and-afters handle exactly two. If you need three or four photos, you're making a grid or collage, not a two-photo combination. For service businesses, two photos is the right number — one before, one after. Three-photo grids are harder to read at a glance and lose the direct comparison that makes before-and-after posts effective. The photo merger online free breakdown covers the two-photo case in detail.
I Built Hosted Snap Because Combining Two Photos Should Cost $0
For two years I paid for design apps I barely used, just to have a clean way to combine photos online for Top Care's weekly posts. I tried the watermark tools, the signup walls, the freight-train suites. None of them fit a cleaning business that needs two-photo posts twice a week, not a design department that needs everything.
So I built Hosted Snap — an online photo combiner that opens to the job and stays there. Two upload slots. A layout picker. A download button. No watermark. Honest pricing, no influencer-tier subscription. The whole architecture is built around the 60-second combine, not a 15-minute scenic tour.
If you run a service business and you've been paying $14.99/month to remove a watermark from your own before-and-afters, I built this for you. The free tools should be free. The paid stuff should earn it.
For the broader guide on combining two photos side by side specifically, the combine two photos side by side pillar covers every layout pattern, platform, and use case in detail.
About Alex Host
I'm Alex Host. I run Top Care Cleaning in Grand Rapids, MI — a family cleaning business my dad and uncle started in 1980. I work there with my brother. We do house washing, gutter cleaning, roof cleaning, window cleaning, carpet cleaning, and Christmas light installation. 400+ Google reviews. Forty-six years of family operation.
I also build SaaS tools for local service businesses — the kind of tools I wish existed when I was paying $4,000/month in Google Ads and getting nickel-and-dimed by every "free" app in my workflow. The whole portfolio lives at hostedbrands.com. Hosted Snap is the first free tool in the stack. There will be more.
If you're a service-business owner who's tired of paying influencer prices for tools you only use twice a week, I built the stack for us. The free tools are honest about being free. The paid stuff is honest about being paid.