Create Side by Side Photo: The Workflow I Use to Post Proof That Wins Jobs
Every Monday I create a side by side photo from the previous week's best job and schedule it for Tuesday morning on Google Business Profile. The whole process takes under three minutes. I was once paying a design app $480 a year to run me through a 12-minute obstacle course to do the same thing. That's the origin story of why I eventually built a better tool. But before we get there, here's the workflow that actually matters — the one built for a service-business owner who has a phone, two job photos, and a post to get out the door.
What does it mean to create a side by side photo?
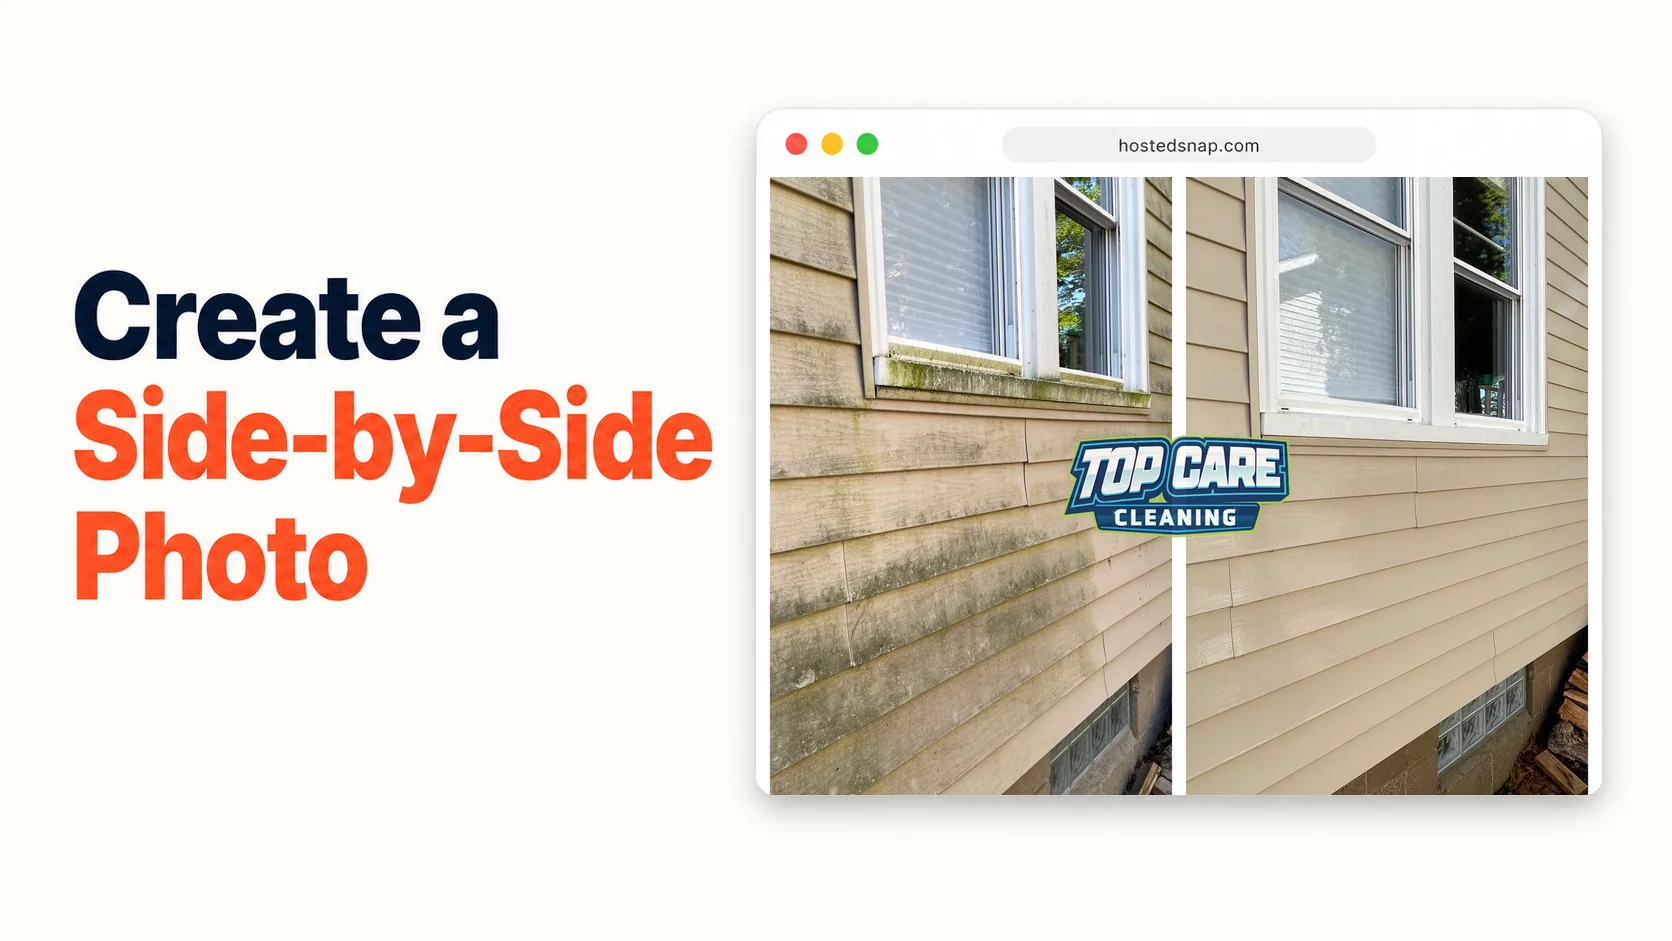
To create a side by side photo is to take two separate images — typically a before and an after — and join them into a single exportable frame. For service businesses, this is the most direct format for publishing visual proof: one photo shows the problem, the other shows the result, and the viewer gets the full story without reading a word. Two images, one post, one decision.
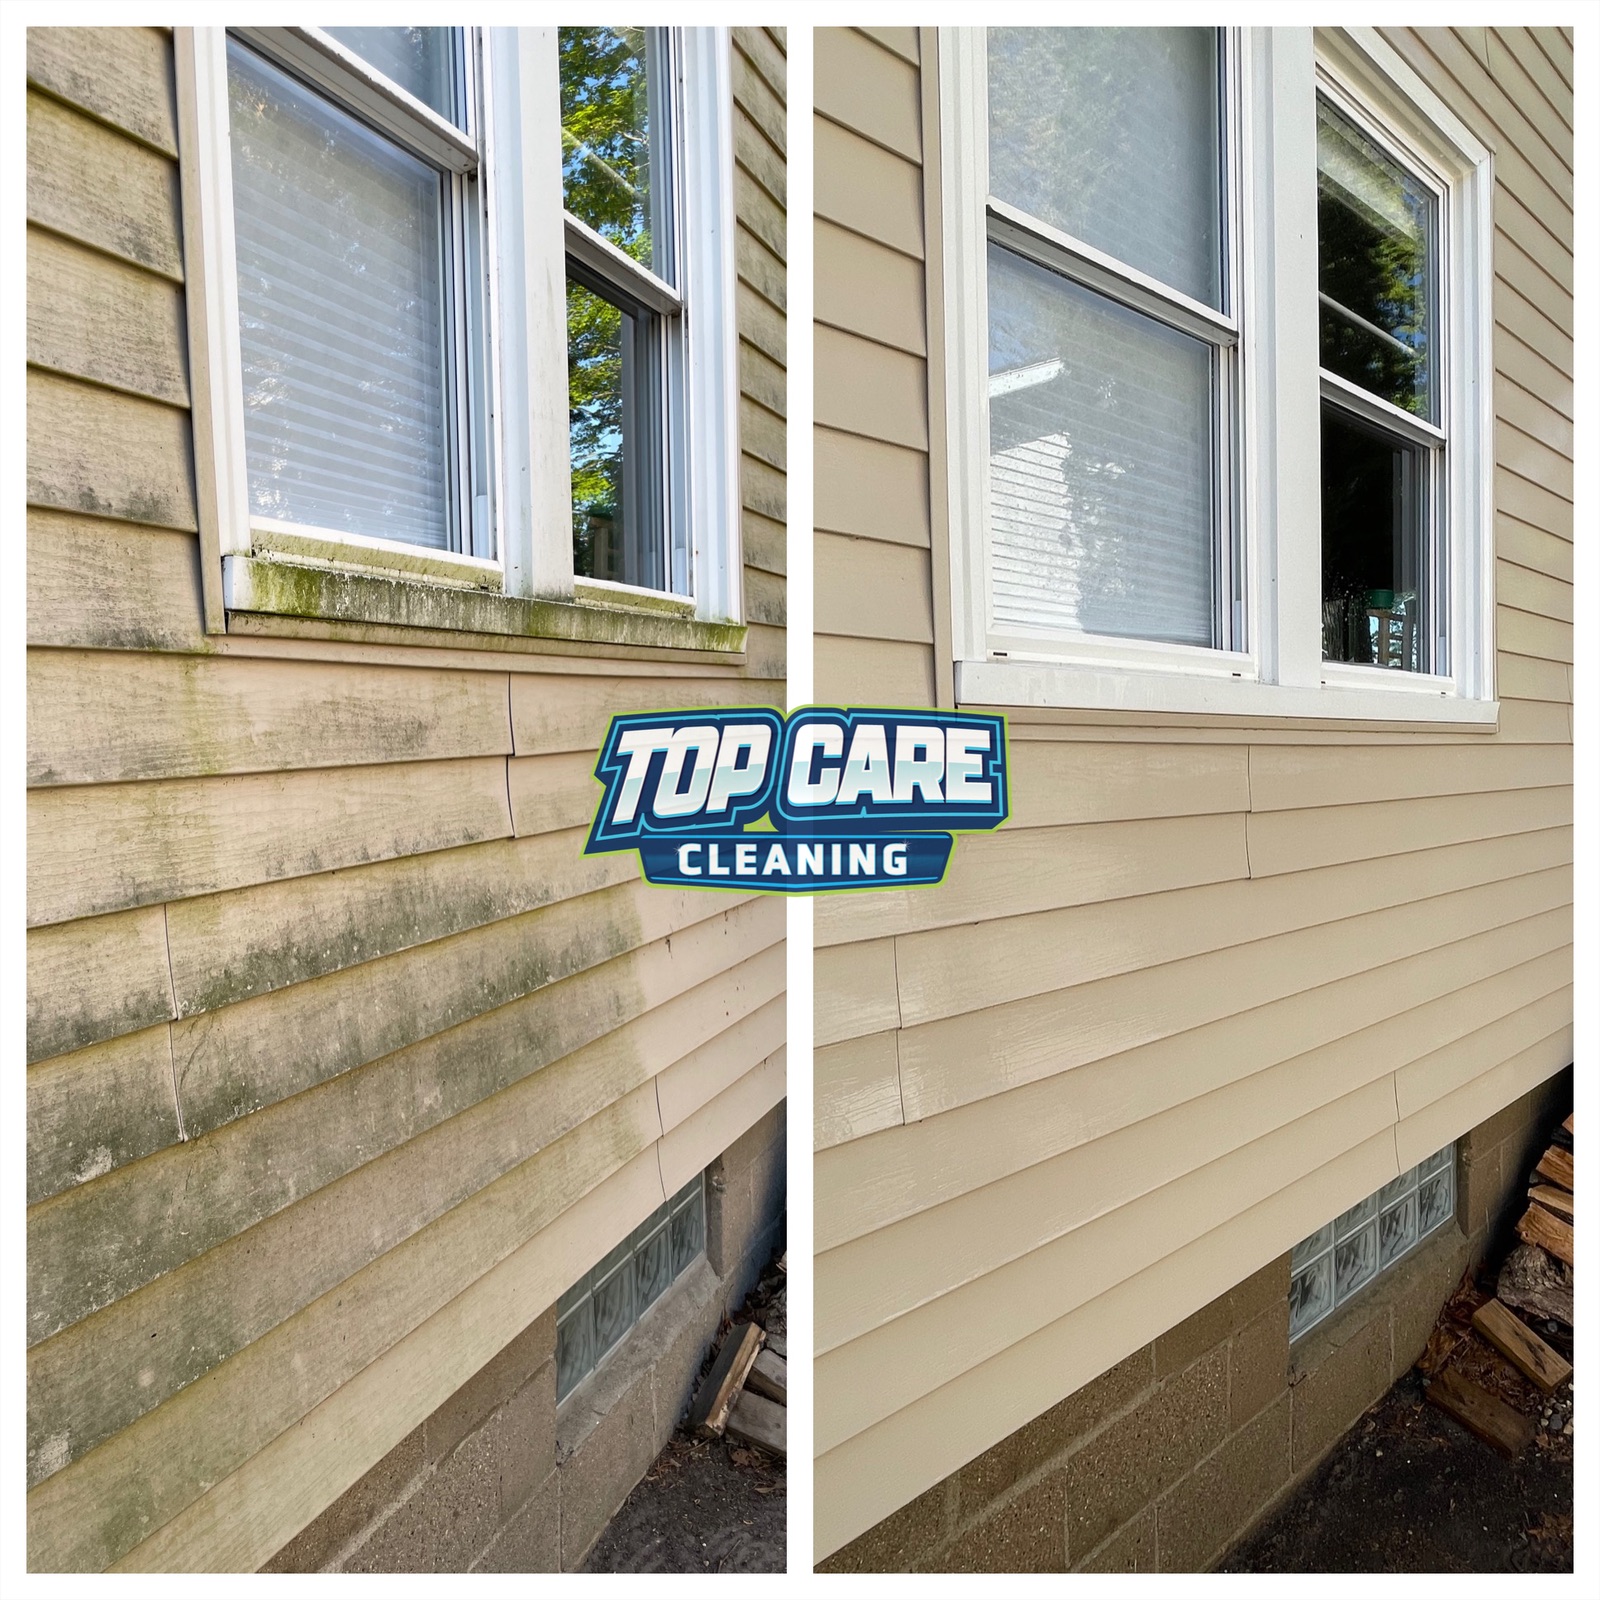 Top Care Cleaning (Grand Rapids, MI) — algae-covered siding on the left, bright clean house on the right. This side by side photo was created in 60 seconds and posted to Google Business Profile the same morning the job was done.
Why Creating a Side by Side Photo Is Different From Just Taking a Good After Shot
I used to post single after photos. Clean driveway, bright siding, spotless gutters. The photos were good. The engagement was not. The reason is obvious once you've seen it enough times: a single after photo asks the viewer to do mental work. They have to imagine the before. They have to supply the contrast themselves. Most people scrolling Google Maps at 8pm won't do that work.
A side by side photo hands the viewer the full proof in one frame. Before on the left. After on the right. The brain registers the transformation instantly. No imagination required.
The other thing a single after photo can't do: establish credibility. Anyone can post a clean house. A side-by-side with algae-covered siding on the left and the same wall bright white on the right is harder to dismiss as stock photography. It reads as evidence. For a buyer choosing between four cleaning companies with similar star ratings, "evidence" clears the field.
Top Care Cleaning has been running before/after posts for four years. The side-by-side format consistently outperforms single photos — 3-4× the views, higher phone-tap rates, and (most importantly) more estimate requests that reference the specific job they saw posted. That last signal is the one that matters. When a customer calls and says "I saw that algae wash on the green house off Lake Drive," they saw a side-by-side, not a solo after shot.
The Intent Behind "Create": Publish-Ready, Not Just Combined
There's a meaningful distinction between mechanically combining two photos and creating a side by side photo that's ready to post. The first is a file operation. The second is a publishing decision.
When someone searches "create side by side photo," they're typically not asking how the file format works. They have two photos, they have somewhere to post them — Google Business Profile, Facebook, an estimate email, a Nextdoor post — and they want an image they can hit send on. The question is how to get from two source photos to a publishable asset without losing 20 minutes.
That's the version I'll walk through here. Not the format theory. The publishing workflow.
Where Service Businesses Actually Post Side by Side Photos
Before I describe how to create one, it's worth being clear about where it goes — because the destination changes what you need from the output.
Google Business Profile Weekly Post
This is the highest-leverage channel for local service businesses. Google's own GBP documentation confirms that posts with photos get significantly more engagement than text-only posts. A side-by-side before/after is the most efficient photo format for that channel because it communicates transformation in a single image and takes up maximum screen real estate in the feed.
For Top Care, the cadence is one post per week, every Tuesday. A house wash, a roof clean, a gutter job — whatever produced the clearest before/after that week. The post goes out with a two-sentence caption: what the job was, where it was (neighborhood, not address), and one trust detail. The photo does 90% of the work.
Facebook Business Page
Same photo as the GBP post, longer caption, different tone. Facebook lets you be more conversational — a short story about the customer, a detail about why the job was unusual, a question that invites comments. The side-by-side drops right into the Facebook feed format. No resizing needed if you exported at native aspect ratio.
Customer Email After the Job
This one is underused and it's genuinely effective. After the job is complete, we send a brief follow-up email with the side-by-side attached. The customer sees their own house in the photo. They remember the work. They forward it to a neighbor more often than you'd expect.
It also sets up the review ask. The email includes the image, a sentence thanking them for the job, and a link to leave a Google review. Close rate on reviews with an embedded before/after is noticeably higher than a plain review-ask text.
Estimate Emails to Prospective Customers
When Top Care sends a quote, we include 2-3 side-by-sides of recent jobs in the same neighborhood. The prospect sees results from four blocks away. That's not marketing copy — that's proof that shows up in their inbox with a proposal.
The side-by-side is the asset that makes this possible. Without a fast way to create it, you'd never do this for every quote. That's exactly why the 60-second workflow matters.
Nextdoor and Neighborhood Facebook Groups
These channels are hyperlocal and the audience is already suspicious of anything that reads like advertising. A side-by-side posted with a matter-of-fact caption ("Just finished this house wash in Eastown — algae gone, no pressure on the siding") reads as a neighbor sharing a result, not a company running an ad. The authenticity premium is real.
How to Create a Side by Side Photo: The Actual Workflow
Here's the workflow as I run it. No theory. No detours through a design suite.
Step 1: Find your two source photos
Open your phone's camera roll or cloud storage. Locate the before photo and the after photo for the job you're posting. The before should have been taken at the start of the job — same angle, same distance from the subject, same orientation (landscape or portrait) as the after.
If the before and after were shot from different angles or at wildly different times of day, stop here. No tool will fix a before shot at 8am with side lighting next to an after shot at 2pm with overhead sun. The viewer's brain flags that as staged. Re-shoot if possible, or pick a different job.
One practical fix: the moment you finish a job, pull up the before photo on your phone and physically stand in the same spot to take the after. Match the frame. This habit takes 30 seconds and it's the difference between a post that reads as real and one that reads as a before-from-Google-Maps.
Step 2: Open a single-purpose tool
Go to a side by side photo maker — specifically a tool that does one job and opens straight to two upload slots. Not a design suite. Not a template library. Not a tool that greets you with a "what would you like to make today?" prompt that sends you three menus deep before you've uploaded anything.
The freighter-to-deliver-a-pizza problem is real. There are full-featured design apps that technically let you create a side-by-side, but the path to that output is a 12-minute scenic route through brand kit setup, project naming, canvas selection, and template browsing. Every click on that journey is friction that a service-business owner doesn't need on a Monday morning between jobs.
Use a tool where the upload slots are on the landing page. That's the test.
Step 3: Upload before (left) and after (right)
Drop your before photo in the left slot and your after in the right. Check that the orientation is correct — before on left is the universal convention. Viewers expect it. Don't flip it to be clever.
If your tool auto-crops the photos to match dimensions, confirm the crops make sense. The crop should never remove the key transformation detail — the part of the house where the algae was, the section of driveway that was stained. If the auto-crop is removing what matters, look for a manual crop control or drag the frame.
Step 4: Choose your layout
For most cleaning work — house washes, gutter cleans, roof work — use a vertical split. The subject is taller than it is wide and the vertical split puts both photos at maximum width on a phone screen. For a wide horizontal subject (a long fence line, a driveway from above), a horizontal stack works better.
Don't add heavy template styling. Thick borders, drop shadows, decorative frames — they signal "this was made in a template tool" and undercut the authenticity. Thin divider or no divider. The photos should sit next to each other cleanly.
Step 5: Label if needed, skip if obvious
Small "Before" / "After" pill labels in the upper corners can help when the transformation is subtle — window cleaning, blind cleaning, jobs where the color contrast isn't dramatic. For algae removal or a concrete pressure wash, the difference is obvious enough that labels feel patronizing. Use your judgment.
Never burn long captions into the image itself. "Call us for a free quote!" baked into the photo destroys the authenticity. The caption goes in the post text. The image stays clean.
Step 6: Export at native resolution
Download the finished image. It should export at the resolution of your source photos. If the download is smaller than expected — a high-res phone photo that comes out at 720p — the tool is deliberately downsampling to push you toward a paid tier. That's the watermark-on-your-own-work model in a different costume. Move on.
Step 7: Post it with intention
For GBP: attach the image to that week's post. Two-sentence caption. Job type and neighborhood. Post by 9am Tuesday.
For the customer email: attach and send same-day or next morning. Don't let it sit in drafts until the customer has forgotten who you are.
For Facebook: same image, longer caption, post later that day.
The asset is now working in three places from one 60-second creation step.
Mistakes That Make a Side by Side Photo Look Amateur
I've made all of these. The list is short because the real mistakes cluster around two root causes: mismatched source photos and over-designed output.
Mismatched angles and lighting
The most common. The before was taken from 10 feet away in portrait mode. The after was a quick shot from 6 feet in landscape. The side-by-side looks like two different houses. The transformation reads as suspicious rather than impressive.
Fix: take both photos from the same spot, same orientation, same time of day when possible. This is a field habit, not a tool fix.
A logo bigger than the work
A cleaning company's logo slapped across the middle of a side-by-side tells the viewer "this is advertising" the moment they see it. The transformation gets demoted to background. Use a corner watermark at most. Let the work lead.
Forcing square output
Most design apps default to 1:1 square because Instagram historically rewarded it. The result: your before photo gets cropped to lose the bottom third of the house, the part that showed the most algae. Native aspect ratio is better for GBP. Don't crop unless you're specifically targeting a square format.
Adding "Before" and "After" text in huge fonts
Big centered "BEFORE" and "AFTER" text with drop shadows is the hallmark of every low-quality service-business social post. Small, corner-placed, low-contrast labels — or nothing. The transformation should be readable without typography carrying it.
Fitting Side by Side Photos Into a Weekly Cadence
Creating a side-by-side is fast once the workflow is set. The harder part is building the habit of always capturing a usable before photo at the start of every job.
At Top Care, we made this a technician standard: the first step after setting up on-site is taking the before photo. Not an afterthought, not "let me find a before after the job's done" — the before gets taken before the trigger is pulled on the pressure washer. This single habit means we always have the raw material to create a side by side photo generator output worth posting.
The downstream cadence follows: Monday is photo selection and creation. Tuesday morning is posting. The social channels get fed consistently without eating into billable hours. Forty-six years of family operation taught us that the business that shows up consistently wins over the business that shows up brilliantly once a quarter.
The put two photos side by side workflow covers the mechanical steps in more detail if you're working through format specifics. The discipline behind the content cadence is the harder thing, and it's worth more than the perfect layout setting.
FAQ — Creating Side by Side Photos for Service Businesses
What's the fastest way to create a side by side photo?
A single-purpose browser tool with two upload slots on the landing page. Upload before and after, choose vertical or horizontal layout, download. Under 60 seconds once you've done it twice. No login, no template navigation, no design suite overhead.
Do I need to resize my photos before creating a side by side?
Not if your tool handles mismatched dimensions automatically — and any competent tool does. The more important check is orientation: both photos should be portrait, or both landscape. A portrait photo next to a landscape photo creates an awkward size mismatch that no tool handles gracefully without heavy cropping.
Should the before photo always be on the left?
Yes, as a strong convention. Before on the left, after on the right mirrors reading direction in English and Western audiences. Viewers process it without thinking. Flipping it creates a half-second of confusion that works against you.
What format should I export the side by side in — JPEG or PNG?
JPEG for photos. PNG adds file size without visible quality improvement for real-world photographic content. GBP, Facebook, and Instagram all handle JPEG perfectly. Export at the highest JPEG quality your tool offers.
Can I create a side by side photo on my phone?
Yes. Browser-based tools work in mobile Safari and Chrome without installing anything. The upload flow on mobile is the same as desktop — tap the upload slot, pull from your camera roll, download when done. For a field workflow, this is all you need.
How do I make a side by side photo look professional without design skills?
Clean source photos, matching angles, no heavy template styling. A professional-looking side-by-side is 90% about the photos going in, not the tool options you apply. Two well-shot photos with a thin divider look better than two mediocre photos with a polished frame and logo treatment.
Is there a free way to make a side by side photo without a watermark?
Yes. Honest-free tools exist that export without watermarking your image. The test is simple: download the output and check the image for a watermark or logo overlay. If it's there, the tool is not free — it's free-with-permanent-advertising-attached. Use a different tool.
How many side by side photos should I post per week?
One per week on GBP is the right frequency. More than one and you're competing with yourself for views. The algorithm rewards recency, not volume, so one well-created post per week consistently beats three in one day.
I Built Hosted Snap Because Creating a Side by Side Photo Should Take 60 Seconds
Four years ago I was building before/after posts for Top Care Cleaning using a design app that cost $400/year and turned a 60-second task into a 12-minute session. The app was built for influencers and agencies. I was a cleaning company owner who needed to create a side by side photo and post it before the 8am crew meeting.
So I built Hosted Snap — a free side-by-side photo tool with two upload slots, a combine button, and a download. Honest pricing, no watermark, no influencer-tier subscription. The whole point is removing the friction so service-business owners can actually run the weekly posting cadence that compounds into local search visibility over months and years.
If you want the full format breakdown, side by side photo is the pillar that covers every pattern, every platform, and four years of Top Care data. This article is about the creation workflow. The pillar is about what you do with it.
About Alex Host
I'm Alex Host. I run Top Care Cleaning in Grand Rapids, MI — a family cleaning business my dad and uncle started in 1980. I work there with my brother. We do house washing, gutter cleaning, roof cleaning, window cleaning, carpet cleaning, and Christmas light installation. 400+ Google reviews. Forty-six years of family operation.
I also build SaaS tools for local service businesses — the kind of tools I wish existed when I was paying $4,000/month in Google Ads and getting nickel-and-dimed by every "free" app in my workflow. The whole portfolio lives at hostedbrands.com. Hosted Snap is the first free tool in the stack. There will be more.
If you're a service-business owner who's tired of paying influencer prices for tools you only use twice a week, I built the stack for us. The free tools are honest about being free. The paid stuff is honest about being paid.