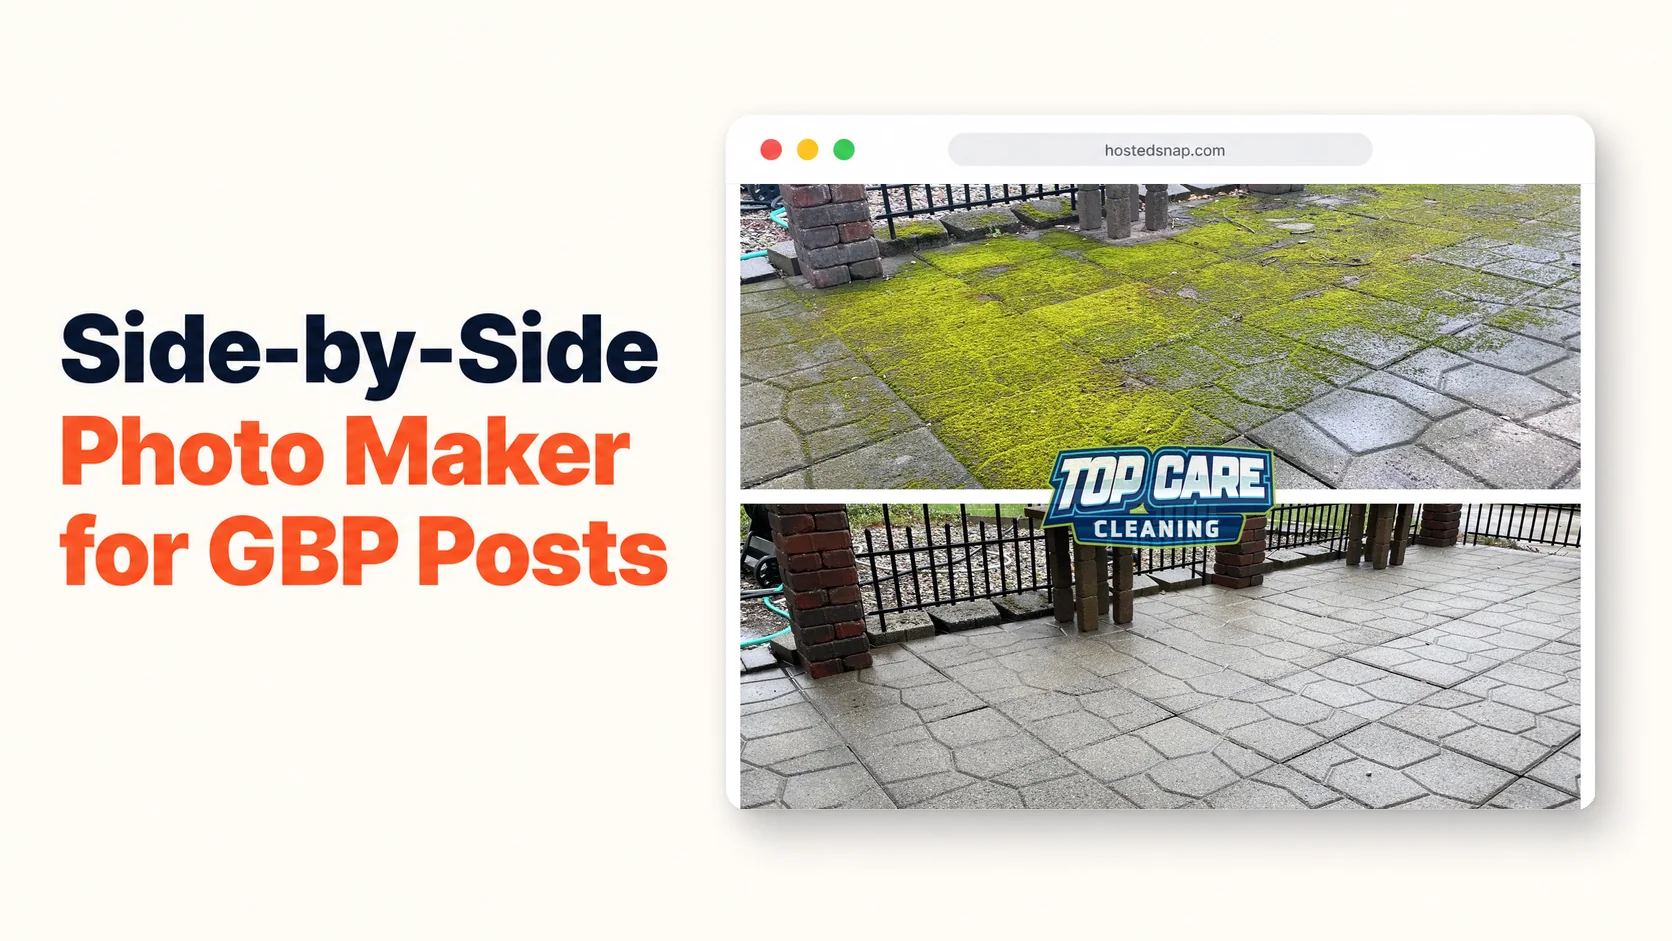
Side by Side Photo Maker: The Free Tool I Built for Service Business GBP Posts
I was paying $29/month for a design app so I could spend 12 minutes producing one side by side photo maker output. Per photo. That's $348/year for a task that is, at its core, "put this photo next to that photo and add a thin line." I was doing this every week for Top Care Cleaning's Google Business Profile. At that pace, I had a marketing habit I couldn't keep. So I built a faster way. This article is about what a side by side photo maker actually needs to do for a service business, why most of the existing options are overkill or broken, and how the 60-second workflow runs at Top Care.
What is a side by side photo maker?
A side by side photo maker is a tool that takes two photos as inputs and joins them into one image — most often a before-and-after — with a vertical or horizontal divider. For service businesses, the output is a single shareable image that fits one Google Business Profile post slot. The best tools do this in under 60 seconds with no account and no watermark on the download. Read the broader side by side photo guide for the full format breakdown.
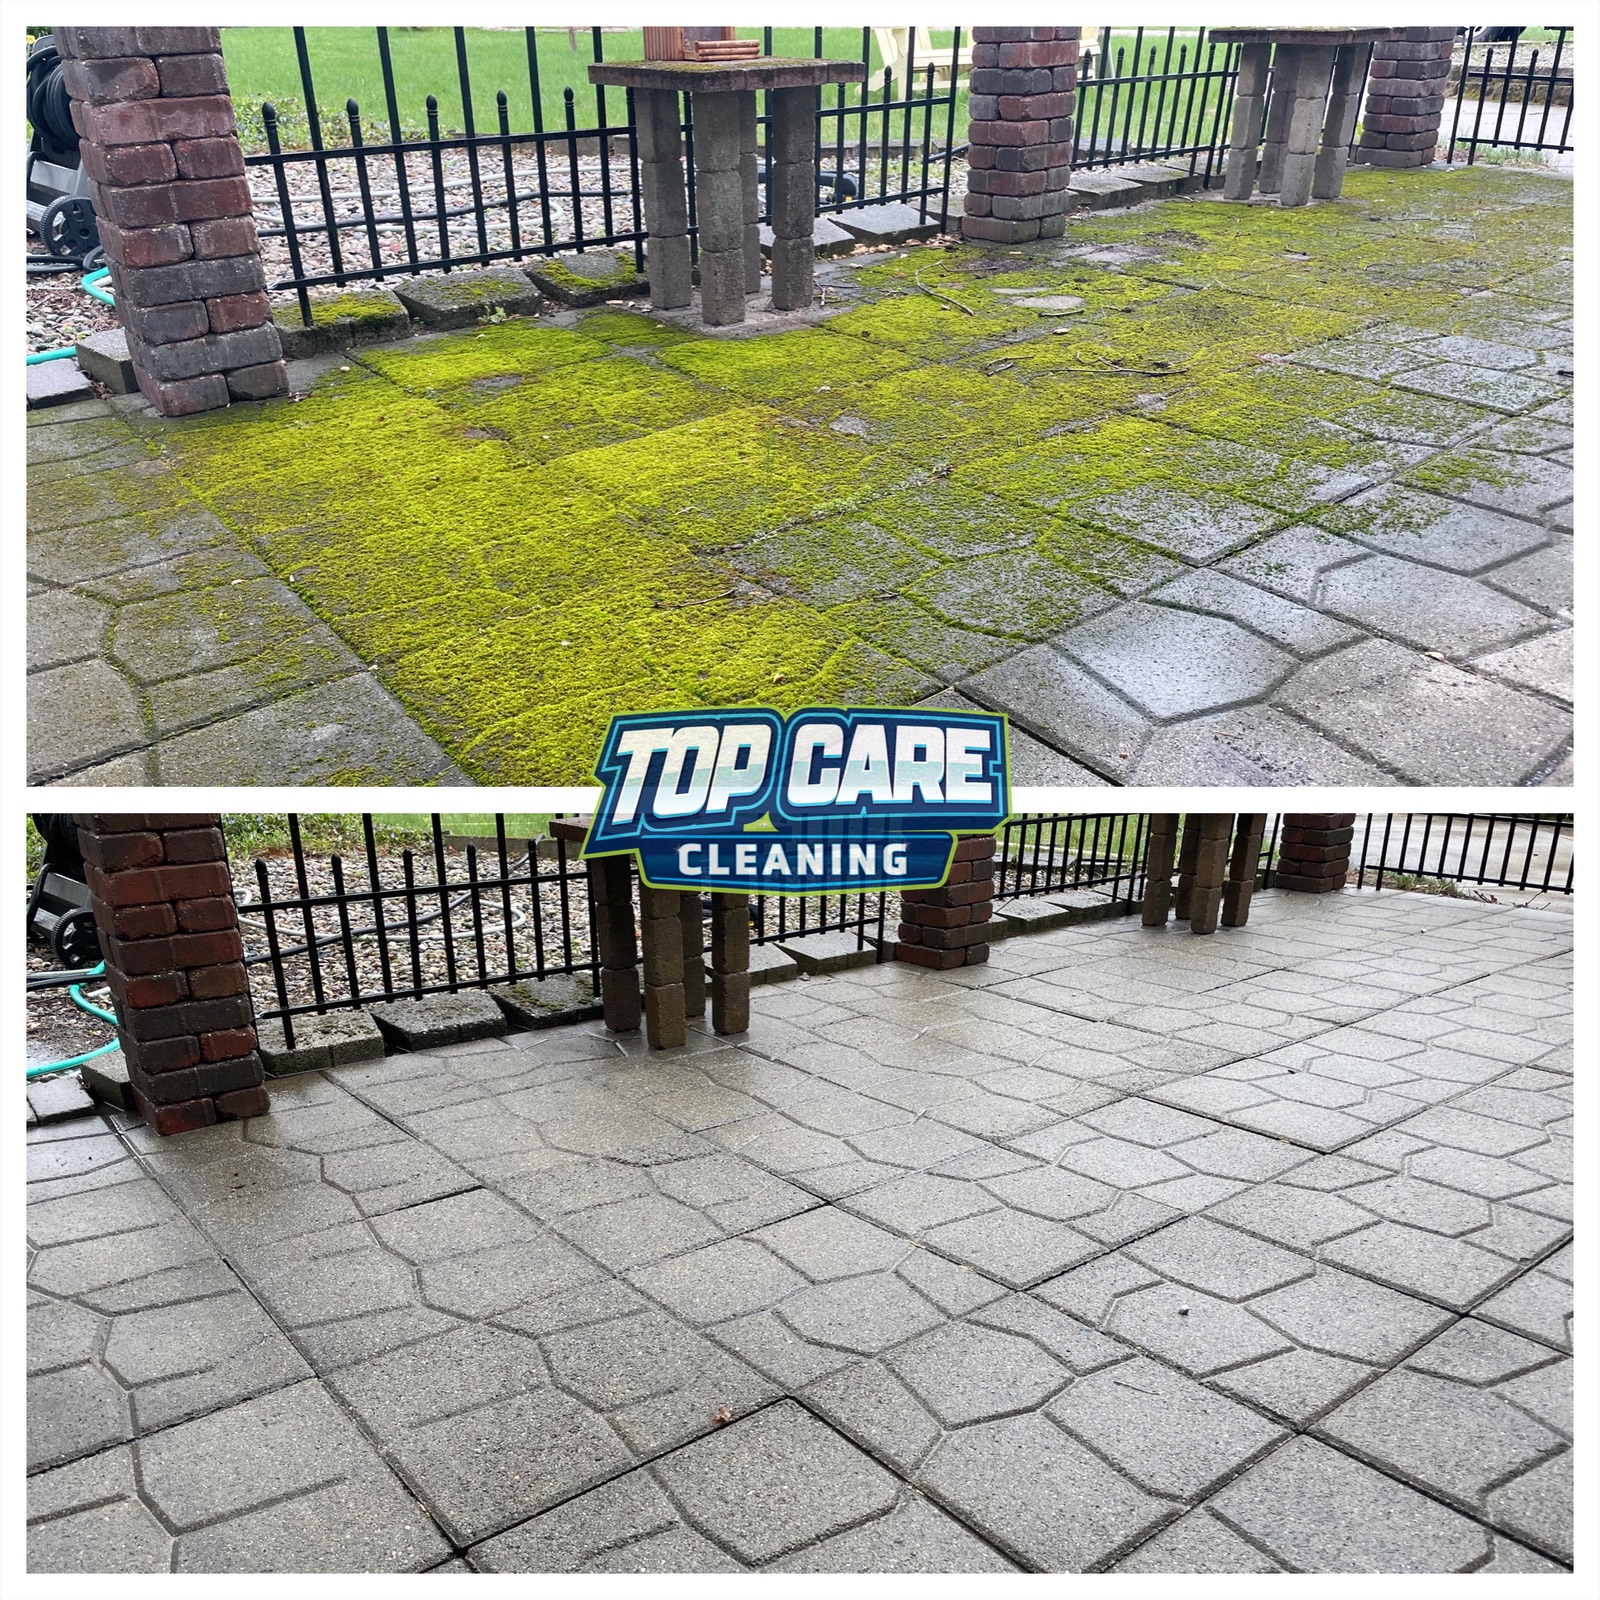 Top Care Cleaning (Grand Rapids, MI) brick power-washing before and after — this is the kind of two-up I post on GBP every Tuesday to show new customers what we do.
Why a Side by Side Photo Maker Is the Most Useful Tool in a Service Business's Kit
Most service businesses have no shortage of job photos. They have a shortage of a fast way to do something with those photos. The phone camera roll is full of befores and afters that never got posted because turning them into one usable image felt like a project.
A side by side photo maker solves exactly that problem. It's the missing step between "I took good photos today" and "I posted good content this week."
For Top Care, that weekly GBP post has a measurable return. Phone calls in the week following a two-photo GBP post run higher than weeks when we post a single image or skip posting entirely. I don't have agency-grade attribution tools. I have four years of weekly posts and a pattern that's consistent enough that I'd never stop.
The Before/After Proves Work in One Scroll
A single "after" photo asks the viewer to take your word for it. A before-and-after joined into one frame shows the delta directly. No imagination required. The viewer registers it as evidence, not marketing.
That's not a minor distinction. For a local service business competing against four or five similar companies with overlapping ratings, evidence beats marketing every time.
One Image, Multiple Channels
The side-by-side you make Monday morning goes on GBP Tuesday, Facebook Tuesday afternoon, and Instagram later in the week. Same file. The side by side photo maker runs once; the asset gets recycled. That's the right math for a small business that can't afford a content team.
At Top Care, we also drop the same image into quote follow-up emails. A potential customer asking about driveway power washing gets a quote plus three side-by-sides of similar driveways we've cleaned in their neighborhood. The close rate on those quotes is noticeably higher than quotes we send without photos.
What to Look For in a Side by Side Photo Maker
Not every side by side photo maker is worth your time. Four criteria matter for a service business:
Criterion 1: No Watermark on Export
If the free tier puts a watermark on your download, that tool is not free. It's free-with-permanent-advertising-attached. You're paying with your brand reputation instead of dollars. That trade is worse than just paying the monthly fee.
Skip any tool that charges to remove a watermark. The watermark-removal tier is a freight-train-to-deliver-a-pizza business model: massively overcomplicated for the simple job it's pretending to do.
Criterion 2: Visible Upload Slots on Landing
The upload interface should be the first thing you see when you open the tool. Not a template gallery. Not a featured-projects inspiration page. Not a signup wall. Two upload slots and a "combine" button.
If you have to dig through menus to find the side-by-side feature, you're in a full design suite, not a purpose-built tool. Full design suites are fine if you need a full design suite. If you need to combine two photos, they're a 15-minute detour for a 60-second job.
Criterion 3: Export at Source Resolution
The downloaded image should match the resolution of your source photos. If your phone shoots at 12MP and the export comes out looking like a web thumbnail, the tool is downsampling — usually to push you toward a paid "HD export" tier.
For Google Business Profile, full resolution matters. A blurry side-by-side is worse than no post at all. It signals that your photos are stock or old or low-effort.
Criterion 4: Layout Options That Match Real Use Cases
Vertical-split for tall subjects (houses, fences, rooms). Horizontal-stack for wide subjects (driveways, rooflines, lawns). A good side by side photo maker lets you pick which one fits the job. A bad one defaults you to 1:1 square regardless and crops your photos to fit.
Square output is fine for Instagram. It's not fine for a driveway before-and-after where the key visual runs horizontal. If the tool can't handle your photo's native aspect ratio, the output will look cropped and amateurish.
The Side by Side Photo Maker Workflow at Top Care (Every Monday)
Here's the exact sequence I run every Monday to produce Tuesday's GBP post. The whole thing takes under three minutes once it's routine.
Step 1: Pick the Photos From That Week's Jobs
Every tech at Top Care takes a before and an after at each job. The before is shot from the entry-side view of the property before work begins. The after is shot from the same spot after pack-up. Same distance, same height, same orientation.
I pull that week's photos from our shared drive on Monday morning. I look for the strongest delta — the before that was visibly dirty and the after that's visibly clean. That's usually the power-washing or soft-wash job.
Step 2: Check Orientation and Dimensions
Both photos need to be the same orientation. Portrait before, landscape after means the side-by-side will have mismatched proportions and one photo will get stretched or cropped to match the other. Fix orientation in your phone's native camera app before you do anything else.
If one photo is significantly lower resolution than the other (happens when a tech uses a different phone), I use the lower-res photo as the "before" — viewers are more forgiving of a slightly blurry before than a blurry after.
Step 3: Open the Side by Side Photo Maker
Drop both photos into the upload slots. For brick or masonry work — like the power-washing jobs Top Care does on older Grand Rapids homes — I use vertical-split. The wall fills the frame better in portrait orientation and the color contrast between dirty mortar and clean mortar reads immediately.
For long driveways or rooflines, I switch to horizontal-stack. The horizontal format fits the subject without cropping half the driveway out of frame.
Step 4: Check the Divider
The divider between the two photos should be thin and low-contrast. One or two pixels. A thick colored bar in the middle looks like a design template. It pulls the eye away from the transformation. The two photos are the content; the divider is infrastructure.
If the tool adds a thick default border, look for a setting to reduce it. If it's locked at thick, that's a design-suite tool trying to give you polish you didn't ask for.
Step 5: Export and Post
Click download. Rename the file to something searchable before uploading to GBP (e.g., "brick-power-wash-grand-rapids-before-after.jpg"). GBP reads file names as context. A descriptive file name is a small SEO signal that costs nothing.
Then post. The caption template I use: service type, neighborhood, one technical detail, one trust signal. Forty words or less. The photo does the work; the caption adds coordinates.
Common Side by Side Photo Maker Mistakes (I Made All of These)
Mistake: Different Angles on Before and After
If the before is shot from the driveway and the after is shot from the porch, the side-by-side doesn't read as a comparison. It reads as two random photos of the same house. The viewer doesn't experience the transformation.
The fix is a phone GPS pin. When you arrive at a job, drop a pin at the exact spot where you took the before. After pack-up, return to that pin. Same spot, same angle, same distance.
Mistake: Forcing Both Photos into a Square
Most side by side photo maker tools default to 1:1 square output. For Instagram, this is fine. For Google Business Profile, it crops your photos unnecessarily.
GBP accepts multiple aspect ratios. Upload at the native ratio of your source photos when possible. The full driveway, the full house wall, the full before-and-after — none of these should have their edges trimmed to fit a square.
Mistake: Adding Text Inside the Image
Burned-in captions ("BEFORE" in giant red font across the top, "AFTER" in giant green font across the bottom) immediately flag the image as marketing-produced. It looks like a billboard.
Small, corner-placed labels are fine when the transformation is subtle. For a before-and-after with an obvious delta — black mold on siding versus clean white siding — labels are redundant. Let the photos speak.
Mistake: Using a Tool That Stamps Its Logo
Some side-by-side tools add their logo to the corner of your downloaded image as the trade-off for "free" access. That's a watermark with branding. Skip those entirely. The side by side photo editor article covers what to look for when you also need to adjust photos before combining — and watermark-free output is the first filter there too.
Mistake: Taking the Before Photo After Work Has Started
This sounds obvious but it happens constantly. The tech starts the job, realizes the before photo is missing, and tries to recreate a "before" from a different angle or a different lighting situation. The side-by-side looks inconsistent and the viewer can tell.
Before photo first. Always. Before the truck gate opens, before the hose uncoils. No exceptions.
Where the Side by Side Photo Maker Fits in a Service Business's Weekly Calendar
A side by side photo maker is not a design tool you use when inspiration strikes. It's a production tool you run on a schedule. The schedule is what creates compounding visibility on Google Business Profile.
Here's how the weekly cycle works at Top Care:
Monday — Pull the week's job photos from shared drive. Pick the strongest before-and-after. Run it through the side by side photo maker. File the output.
Tuesday — Post to Google Business Profile. Caption: job type, neighborhood, technical detail, trust signal. Done in under five minutes.
Tuesday (same day, later) — Post to Facebook and Instagram. Same image, longer caption with more personality. Sometimes includes the customer's first name if they've consented.
Ongoing — Archive every side-by-side by service type and neighborhood. When we send a quote to a prospect in East Grand Rapids for driveway power washing, we pull the three most recent side-by-sides from that neighborhood and drop them into the quote email.
That archive is worth more over time than almost any other content asset we produce. Four years of weekly posts means we have a documented record of nearly every major job type in nearly every major neighborhood in Grand Rapids.
If you want to extend this workflow to putting two photos side by side for use cases beyond before-and-after — like a two-angle composite or a process-plus-result shot — that article walks through the non-before-and-after patterns in more detail.
For a mobile-first workflow, the app for side by side photos article covers how to run this whole sequence from your phone without installing a native app.
Side by Side Photo Maker — FAQ
Is a side by side photo maker actually free?
Some are, some aren't. The honest-free tools export at full resolution with no watermark and no subscription required. The "free" tools that stamp a watermark on your download are not actually free — you're paying with your branding. Filter for no-watermark export before you commit to a workflow.
What's the best output format — JPG or PNG?
JPG at high quality (85–95%) for Google Business Profile posts and social media. PNG if the image has text labels or graphic elements with hard edges. For a standard before-and-after photo, JPG is smaller, loads faster, and looks identical to PNG at normal viewing sizes.
Do I need to resize my photos before using a side by side photo maker?
Not if both photos are the same orientation and similar dimensions. If one photo is significantly higher resolution than the other, the tool may either crop the smaller one or compress the larger one to match. Shooting both photos on the same phone with the same settings eliminates the problem.
How do I make the before and after look like the same location?
Consistent angle, consistent height, consistent distance from the subject. Drop a GPS pin when you take the before photo. Return to that pin for the after. The two photos should be mentally overlayable — if you squinted, you should be able to imagine one dissolving into the other.
Can I use a side by side photo maker for things other than before and after?
Yes. Two angles of the same finished job. A process shot (crew working) paired with a result shot. Two different jobs at two different addresses to show range. The two photos side by side article covers these non-before-and-after patterns in detail.
How often should I use a side by side photo maker for GBP posts?
Once a week is enough for Google Business Profile. Posting more than once per week on GBP dilutes your own recency — Google Business Profile help documentation confirms that recency matters in how posts surface to local searchers. Weekly is the right cadence for most local service businesses.
Should I add my company name to the side-by-side image?
A small corner logo or a baseline text tag is fine. A large centered logo dominates the image and signals "advertisement" to the viewer. The before-and-after is the proof; the branding is the attribution. Keep the logo smaller than the subject.
What aspect ratio should I export for different platforms?
Google Business Profile: 4:3 or the native aspect of your source photos. Instagram feed: 1:1 or 4:5. Facebook: 1:1 or 16:9. Instagram Stories and Reels: 9:16. For most service-business use cases, native aspect ratio exported without cropping is the right default — then re-crop only if the platform demands it.
I Built Hosted Snap Because a Side by Side Photo Maker Should Take 60 Seconds
I was spending 12 minutes per side-by-side using a full design suite that was priced for influencers who needed it daily for 40 different content formats. I needed it once a week to put a before photo next to an after photo. The cost-per-use math was absurd.
So I built Hosted Snap — a side by side photo maker that does the one job. Two upload slots. A combine button. Export at source resolution, no watermark, honest pricing without an influencer-tier subscription. The whole flow runs in under 60 seconds.
Top Care has been using it since I launched it. The Tuesday GBP post habit is still running. The before-and-after archive is at four years and counting.
If you run a service business and you've been skipping the weekly GBP post because the production step is too slow, that's the problem Hosted Snap solves.
About Alex Host
I'm Alex Host. I run Top Care Cleaning in Grand Rapids, MI — a family cleaning business my dad and uncle started in 1980. I work there with my brother. We do house washing, gutter cleaning, roof cleaning, window cleaning, carpet cleaning, and Christmas light installation. 400+ Google reviews. Forty-six years of family operation.
I also build SaaS tools for local service businesses — the kind of tools I wish existed when I was paying $4,000/month in Google Ads and getting nickel-and-dimed by every "free" app in my workflow. The whole portfolio lives at hostedbrands.com. Hosted Snap is the first free tool in the stack. There will be more.
If you're a service-business owner who's tired of paying influencer prices for tools you only use twice a week, I built the stack for us. The free tools are honest about being free. The paid stuff is honest about being paid. I built Hosted Snap specifically because I was spending 12 minutes on a side by side photo maker task that should take 60 seconds — and I figured most service businesses have the same problem.