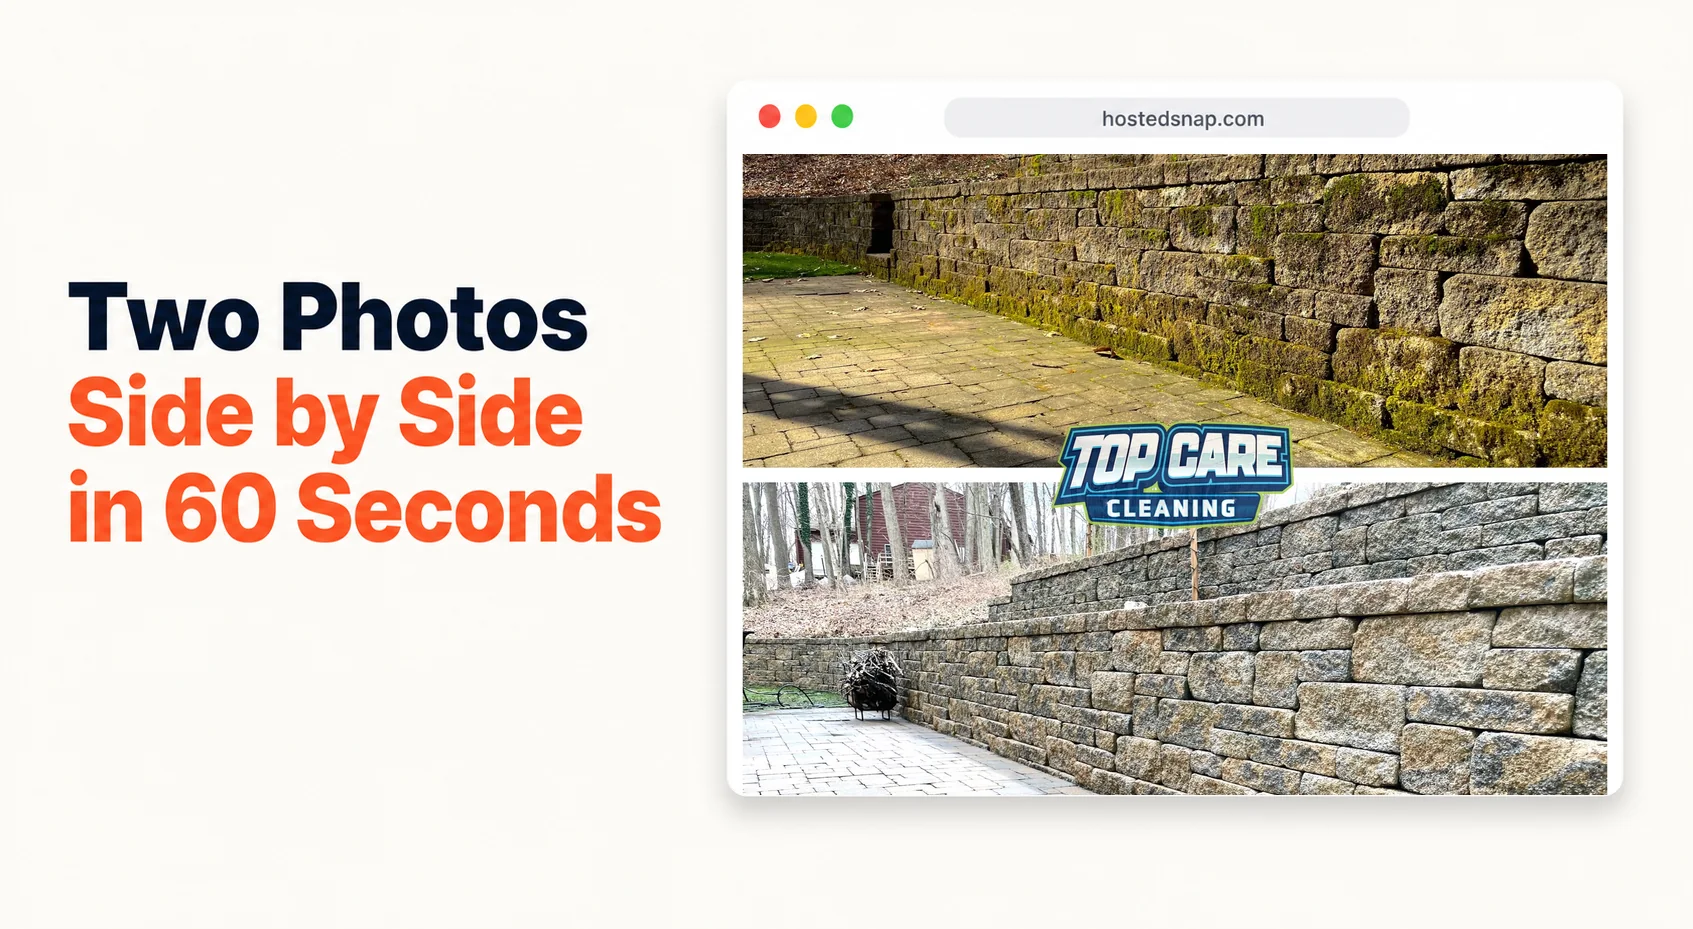
Two Photos Side by Side: The Before-and-After Format That Converts Browsers Into Buyers
I put two photos side by side every single Tuesday for Top Care Cleaning and it consistently outperforms every other type of post I've ever made. Not by a little. One before, one after, one combined frame — stone, siding, gutters, roofs — posted at 8am on Google Business Profile while most of my competitors post nothing. I've been doing this long enough to know it works. I built a tool to make it fast because it was taking me 15 minutes per photo when it should take 60 seconds.
What Does It Mean to Put Two Photos Side by Side?
Two photos side by side means exactly what it says: two images joined into a single frame, separated by a vertical or horizontal divider. For service businesses, this is almost always a before-and-after — the same subject, same angle, two points in time. One photo tells you a job happened. Two photos side by side proves the transformation.
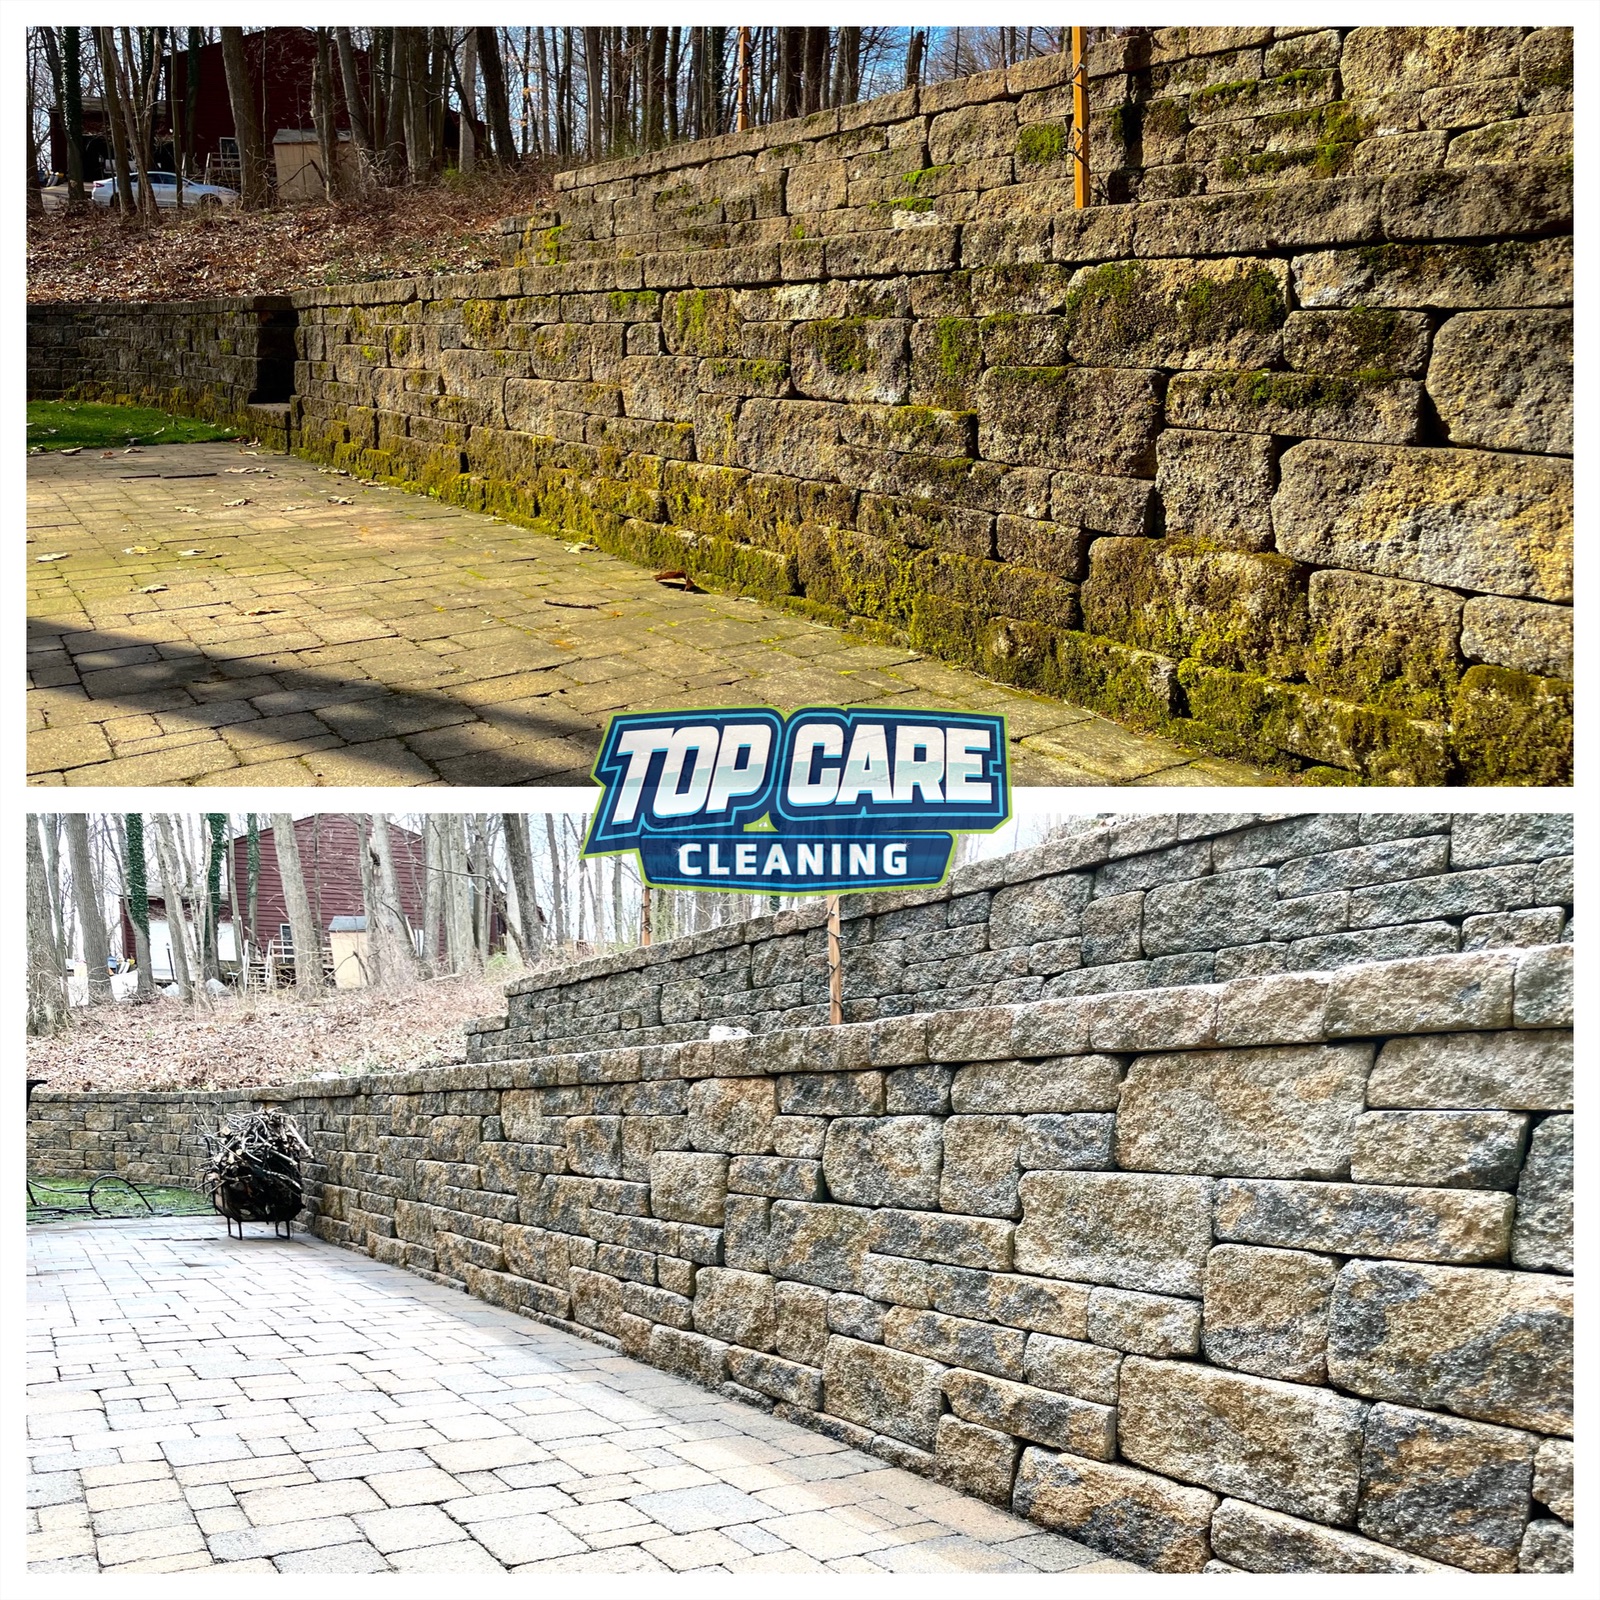 Real two photos side by side from Top Care Cleaning (Grand Rapids, MI) — stone power washing, grimy surface on the left, restored clean stone on the right. Two photos tell the full job story in one frame.
Why Two Photos Side by Side Outperform a Single After Shot
A single "after" photo asks the viewer to do mental work. They have to imagine the before — how dirty it was, how dramatic the change. Most people scrolling Google Maps or Facebook at 9pm are not going to do that work. They keep scrolling.
Two photos side by side do the work for them. The contrast is immediate. The brain registers transformation in under a second. That's not a theory — it's the behavior I've watched on Top Care Cleaning's Google Business Profile for four years straight.
The other factor is trust. A single polished "after" photo could be stock, could be staged, could be someone else's job. Two photos side by side with the same address, same angle, and matching shadows are hard to fake. Viewers register that as evidence, not advertising. In a market where five cleaning companies all have 4.8 stars and similar pricing, evidence wins.
For the broader context on this format — the patterns, use cases, and platform logic — the full breakdown lives at side by side photo. This article focuses on the specific act of combining two photos and what makes it work.
The Jobs That Make Two-Photo Posts Shine
Not every service job photographs equally. After years of producing these for Top Care, I know which categories generate the strongest two-photo posts and which ones are harder to shoot.
Exterior Cleaning
This is the highest-contrast category. Pressure washing, soft washing, roof cleaning, gutter cleaning — the before is almost always visually dramatic. Dark stains, green algae, packed gutter debris. The after is clean, bright, restored. The side-by-side sells itself.
For stone surfaces specifically — flagstone, brick, concrete block, paver driveways — power washing before-and-afters are some of the most striking side-by-sides I've produced. The stone grain texture comes back after a wash in a way that photographs beautifully. One frame tells the whole story.
Window Cleaning
Window cleaning is a harder category for single photos. Clean glass is invisible. But two photos side by side — interior view, streaky and hazy on the left, crystal clear on the right with the outside yard visible — that version works. The contrast shows because the viewer can see through to the background in the "after" but can't in the "before."
Driveway and Concrete Work
Long driveways benefit from the horizontal-stack layout — before on top, after on bottom — because the subject is wider than it is tall. Concrete power washes are some of our most-saved posts. The visual gap between oil-stained, weathered concrete and clean, light concrete is stark.
Carpet Cleaning
Indoor carpet work follows the same logic as stone and concrete. A square of carpet before cleaning is visually dull. Side by side with the clean version, the fiber brightness difference lands. Shoot both from the same standing position, same room corner.
Roof Cleaning
Algae-streaked roofs are highly photogenic. The before is black-streaked, faded shingles. The after is restored, uniform color. Horizontal-stack layout works better for most roofs since you're shooting from across the yard with the wide edge of the house in the frame.
Five Mistakes That Ruin a Two-Photo Post
I've made all of these. They're fixable — but easier to avoid in the first place.
Mismatched Angles
The single worst mistake. If the before photo is shot from 8 feet at a slight angle and the after is shot from 15 feet straight-on, the viewer won't read it as a before-and-after. They'll read it as two unrelated photos. The transformation disappears.
Fix: when you shoot the before, drop a marker in your phone GPS. After the job is done, walk back to the same spot, same height, same horizontal angle. The viewer should be able to trace the same physical details across both photos.
Different Lighting Conditions
A before shot at 7am with harsh east-facing light and an after shot at 2pm with flat overhead sun are going to look like two different houses regardless of the cleaning. The lighting difference will read as manipulation to viewers who are paying attention.
Fix: shoot before and after in the same lighting window. Both in morning, both in overcast. Or shoot both on the same overcast day when lighting is consistent.
Logo Bigger Than the Work
I've put Top Care's logo too large on too many side-by-sides. Every time I do, engagement drops. A giant logo across the middle of the frame signals "this is marketing" the second the viewer sees it. The work should dominate. A small corner watermark is enough.
Forcing Two Different Aspect Ratios Together
A vertical portrait photo on the left, a horizontal landscape photo on the right. The tool will crop one of them to make them match — and whatever gets cropped loses the edges that proved the full job was complete. The corner of the house, the end of the driveway.
Fix: shoot before and after in the same orientation. Both portrait or both landscape. If you can't reshoot the mismatched set, use a tool that lets you control the crop manually rather than auto-cropping.
Text-Heavy Burns Into the Image
"Before" and "After" labels in tiny corner pills — fine, useful even for subtle transformations. But full sentences burned into the image ("Professional power washing — Top Care Cleaning — Grand Rapids MI — call now for a free quote") destroy the post. Text belongs in the caption. The image stays clean.
If the two-photo post can't communicate the transformation without a paragraph burned in, the before-and-after wasn't dramatic enough to post. Reshoot or skip it.
How to Actually Put Two Photos Side by Side (The 60-Second Workflow)
Here is the exact process I run every Monday to prepare Top Care's weekly GBP post. Once it's muscle memory, the production step from photos-on-phone to combined-image takes under a minute.
Step 1: Confirm Both Photos Are Post-Worthy
Before you open any tool, confirm the pair is worth posting. Same subject. Same angle. Matching orientation. The transformation is visually clear without explanation. If one of the two photos is slightly off-angle, decide now whether it's close enough or whether you're posting a weaker version.
Don't try to fix a bad photo inside the combining tool. Fix it in your phone's native photo editor first, or pull a better source photo.
Step 2: Open a Single-Purpose Combining Tool
Go to a browser-based tool that does exactly one job: take two photos and combine them. Not a full design suite with templates and brand kits and a 20-panel sidebar. A tool that opens to two upload slots and a combine button.
The reason I'm specific about this: design-suite tools are freight-trains-to-deliver-a-pizza for this task. They're built for graphic designers producing complex assets, not for a cleaning company owner who needs to put two photos side by side and post to GBP in two minutes. You end up navigating five menus and resizing handles you didn't ask for.
Step 3: Upload and Choose Your Layout
Upload the before (left or top) and the after (right or bottom). Then choose:
- Vertical-split for tall subjects (houses, fences, vertical stone walls). The split runs down the middle and both photos display at full height on a phone screen.
- Horizontal-stack for wide subjects (driveways, rooflines, long fence sections). The split runs across the middle. Both photos display at full width.
Most stone and masonry work I do calls for vertical-split. Driveways and rooflines usually get horizontal-stack.
Step 4: Add Labels If the Transformation Is Subtle
For dramatic transformations — algae-black roof to clean, oil-stained driveway to bare concrete — labels are optional. The viewer reads the before-and-after without help.
For subtler transformations — window cleaning, blind cleaning, carpet texture — small "Before" and "After" pill labels in the top corners help orient the viewer fast. Small text, low contrast, corner-placed. Not a banner across the middle.
Step 5: Export at Full Resolution
Download the combined image. Check the file size — it should be comparable to the source photos. If a 2MB before and a 2MB after produce a 200KB combined export, the tool is downsampling to upsell you on a paid tier for full resolution. That's a different kind of watermark-on-your-own-work.
A legitimate honest-free tool exports at the resolution of your inputs.
Step 6: Post Across the Stack
For Top Care, one combined image goes to:
- Google Business Profile (Tuesday morning)
- Instagram and Facebook (same day, different caption style)
- Quote emails when the job matches the neighborhood we're quoting in
Same asset. Three channels. The two pictures side by side format works identically across all three. You make it once and spread it.
Where Two-Photo Posts Fit in a Service Business Calendar
One two-photo post per week is enough. More than that and the individual posts get less attention per week — the format works partly because it shows up consistently, not because you flood the feed.
At Top Care, the weekly GBP post cycle looks like this:
Monday: Find and confirm the before-and-after pair for this week. Usually from the previous week's jobs. The technicians know to flag photogenic jobs.
Monday (5 minutes): Combine the photos. Write the caption. Schedule it.
Tuesday 8am: Post goes live on GBP.
Tuesday same day: Same image posted to Instagram and Facebook with a different caption. Instagram gets the more minimal, photo-forward caption. Facebook gets a slightly longer version with a CTA to message for a quote.
Ongoing: When a customer leaves a Google review mentioning a specific job, reply and include the two-photo composite of their job. Public signal that we document our work, we remember the customer, and the transformation was real.
That last part — replying to Google reviews with the actual two-photo post from the job — is one of the highest-leverage things a service business can do with this format. Most businesses don't do it because combining two photos used to take too long. At 60 seconds per post, it's worth doing every time.
Two-Photo Posts Across Service Verticals
The format scales beyond cleaning. Here's the mental model across common trades.
HVAC and plumbing: Pattern 4 (process + result) more than before/after. A before photo of a dirty air handler and an after of a clean one is useful. But a photo of the tech mid-installation plus the finished clean install often performs better — it shows labor, not just transformation.
Landscaping: Horizontal-stack for lawn overviews and long hedgelines. Vertical-split for hedge trimming and close-up tree work. Pattern 5 (two different properties) once a quarter to show range across neighborhoods.
Auto detailing: Vertical-split for interior seats, carpets, and consoles. Horizontal-stack for exterior — a car's profile is wider than it is tall. The paint-correction before-and-afters are some of the most striking two-photo posts in any service vertical.
Renovation and remodeling: Vertical-split for room interiors (kitchen, bathroom, floors). Process + result for anything with dramatic demo footage. A gutted kitchen mid-demo on the left, the finished kitchen on the right, is more compelling than dirty kitchen / finished kitchen because the labor story is visible.
Christmas lights (seasonal): Vertical-split with the lights ON in the after photo. Day shot before, night shot after. The contrast between a plain roofline and a lit roofline is automatic. We use this at Top Care every November and December — it's one of our best-performing post types of the year.
The side by side photo maker walkthrough covers the tool workflow for all of these verticals in more depth if you want the format-specific guidance.
Two Photos Side by Side — FAQ
What's the fastest way to put two photos side by side?
Open a browser-based tool built for exactly this task, upload both photos, pick your layout (vertical-split or horizontal-stack), and download. If the process takes more than 90 seconds, the tool is doing too much for the task.
Do I need a special app to combine two photos?
No. Browser-based tools work on both desktop and mobile. You don't need to install a native app. The picture side by side app article covers the mobile-specific workflow if you prefer working on your phone.
What's the best layout — vertical or horizontal?
Vertical-split (photos side by side, left and right) for tall subjects: houses, walls, fences, doors. Horizontal-stack (photos top and bottom) for wide subjects: driveways, rooflines, long fence sections. When in doubt, vertical-split is the better default for phone screens because it uses the full width.
Should the before photo always go on the left?
For left-to-right reading cultures, yes. Before on the left, after on the right mirrors the reader's natural scan direction. The brain reads left as "past" and right as "present/result." Reversing it works against the viewer's instincts.
How big should the combined image be?
Match the output to the platform. Google Business Profile accepts images up to 5MB and displays at roughly 720px on most screens — no need to export above that. Instagram and Facebook accept high-res uploads and will compress on their own. Always export at full resolution from the tool and let the platform handle compression.
Can I combine photos with different aspect ratios?
Most tools will crop the taller or wider photo to match. The better approach: shoot both source photos in the same orientation and similar dimensions. If you have a mismatch, use a tool that lets you set the crop anchor manually — choose which part of each photo to keep.
What about adding text or labels to the combined photo?
Small "Before" and "After" pill labels in the top corners are useful for subtle transformations. Avoid burning long text into the image — captions belong in the post caption, not the photo. The image should be clean enough to tell the story without text.
Do two-photo posts get more reach on Google Business Profile?
In my four years of running these for Top Care, side-by-side before-and-afters consistently outperform single-photo posts for profile views and phone call clicks. The format is scroll-stopping because it shows transformation in one frame. I don't have a controlled study. I have four years of weekly posting data from one company in one market, and the gap is consistent.
I Built Hosted Snap Because Two Photos Should Take 60 Seconds
Two years ago I was spending $40 a month on a design app and 15 minutes per image to produce side-by-side posts for Top Care Cleaning. The workflow required templates, exports, resizing, re-exports. It was a freight-train-to-deliver-a-pizza. For a cleaning company posting weekly, the math didn't work.
So I built Hosted Snap — a free tool that does exactly one job: take two photos and put them side by side. Honest pricing, no watermark, no influencer-tier subscription. No signup wall designed to trap you in a funnel. Open it, combine two photos, download, post.
The whole point is getting the production step out of the way so service-business owners can actually post the weekly side-by-side that grows local search visibility — instead of abandoning the habit because the tool takes too long.
If you're already posting weekly two-photo content and want to understand the strategy behind the format, the full pattern library is at side by side photo. If you want the tool, it's at Hosted Snap.
About Alex Host
I'm Alex Host. I run Top Care Cleaning in Grand Rapids, MI — a family cleaning business my dad and uncle started in 1980. I work there with my brother. We do house washing, gutter cleaning, roof cleaning, window cleaning, carpet cleaning, and Christmas light installation. 400+ Google reviews. Forty-six years of family operation.
I also build SaaS tools for local service businesses — the kind of tools I wish existed when I was paying $4,000/month in Google Ads and getting nickel-and-dimed by every "free" app in my workflow. The whole portfolio lives at hostedbrands.com. Hosted Snap is the first free tool in the stack. There will be more.
If you're a service-business owner who's tired of paying influencer prices for tools you only use twice a week, I built the stack for us. The free tools are honest about being free. The paid stuff is honest about being paid.