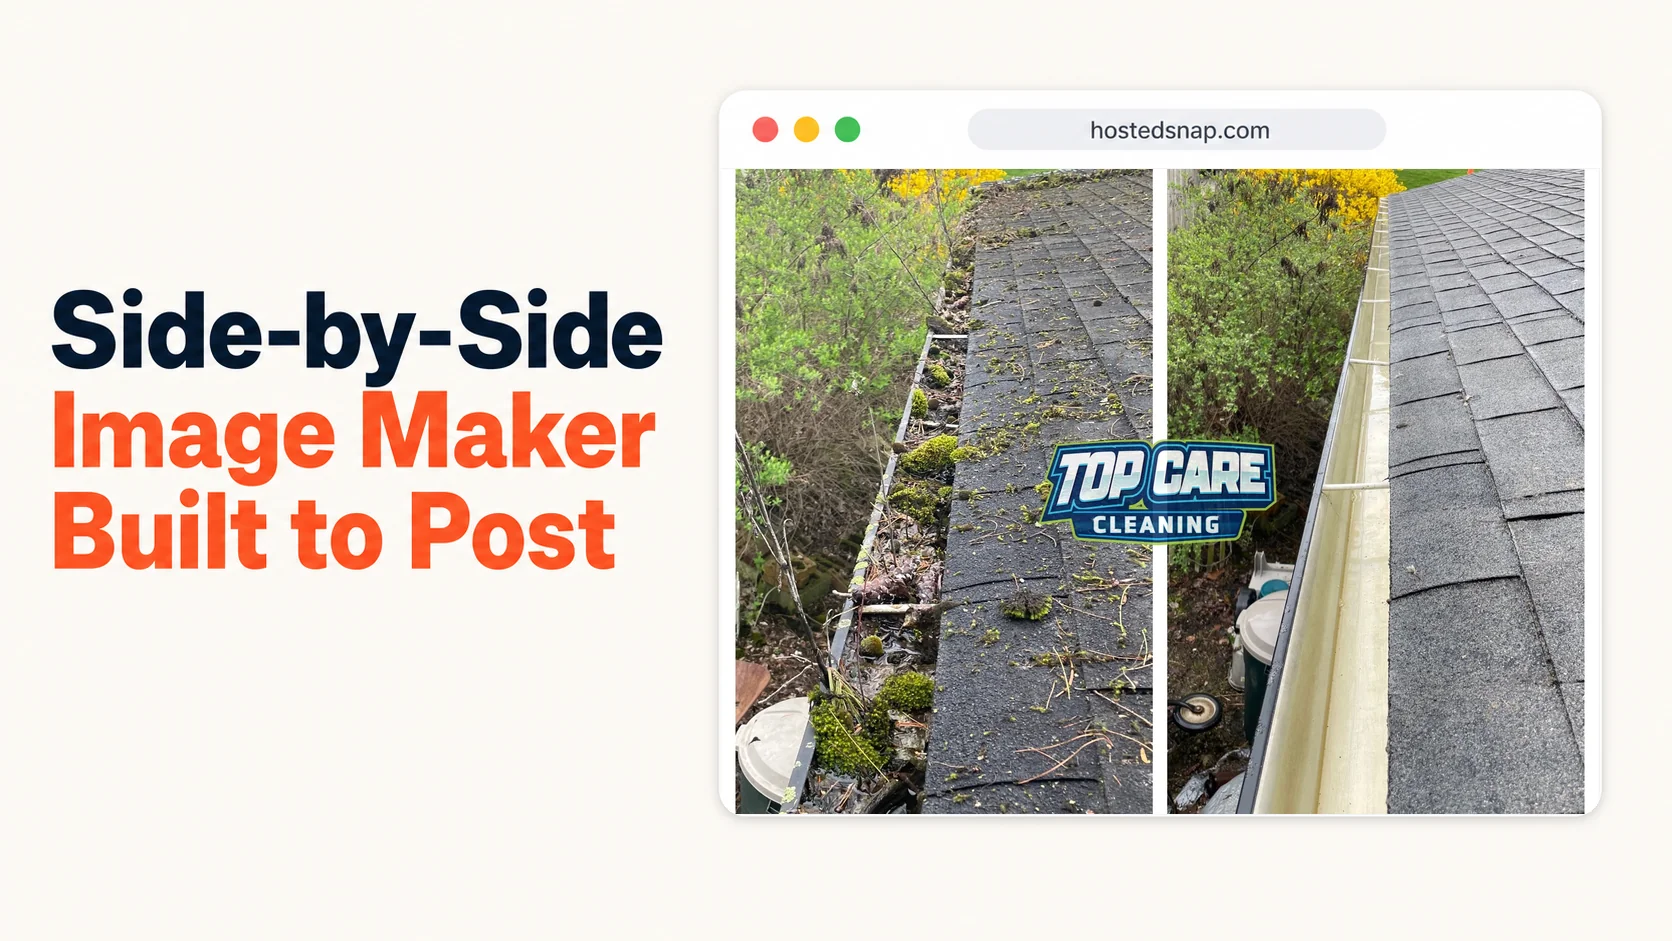
Side by Side Image Maker: The Free Tool I Built for Service Business Proof Posts
I used to spend $120 a year on a design app just to use a side by side image maker twice a week for Top Care Cleaning. Twelve minutes per image. Four clicks to export. A watermark on my own work unless I paid extra. We had 400+ Google reviews and 46 years of family operation behind us — and I was still jumping through hoops to stitch two gutter photos together. That math stopped making sense. I built a better path.
What Is a Side by Side Image Maker?
A side by side image maker is a tool that joins two photos into a single combined image — placed either left-right or top-bottom — for direct comparison, before-and-after proof, or dual-angle presentation. For service businesses, it's the core production tool for every transformation photo that lands on Google Business Profile, Facebook, or an estimate email. One tool. One job.
"Image" and "photo" mean the same thing here. If you searched for a side by side image maker or a side by side photo maker, you're looking for the exact same thing. Don't let the terminology slow you down.
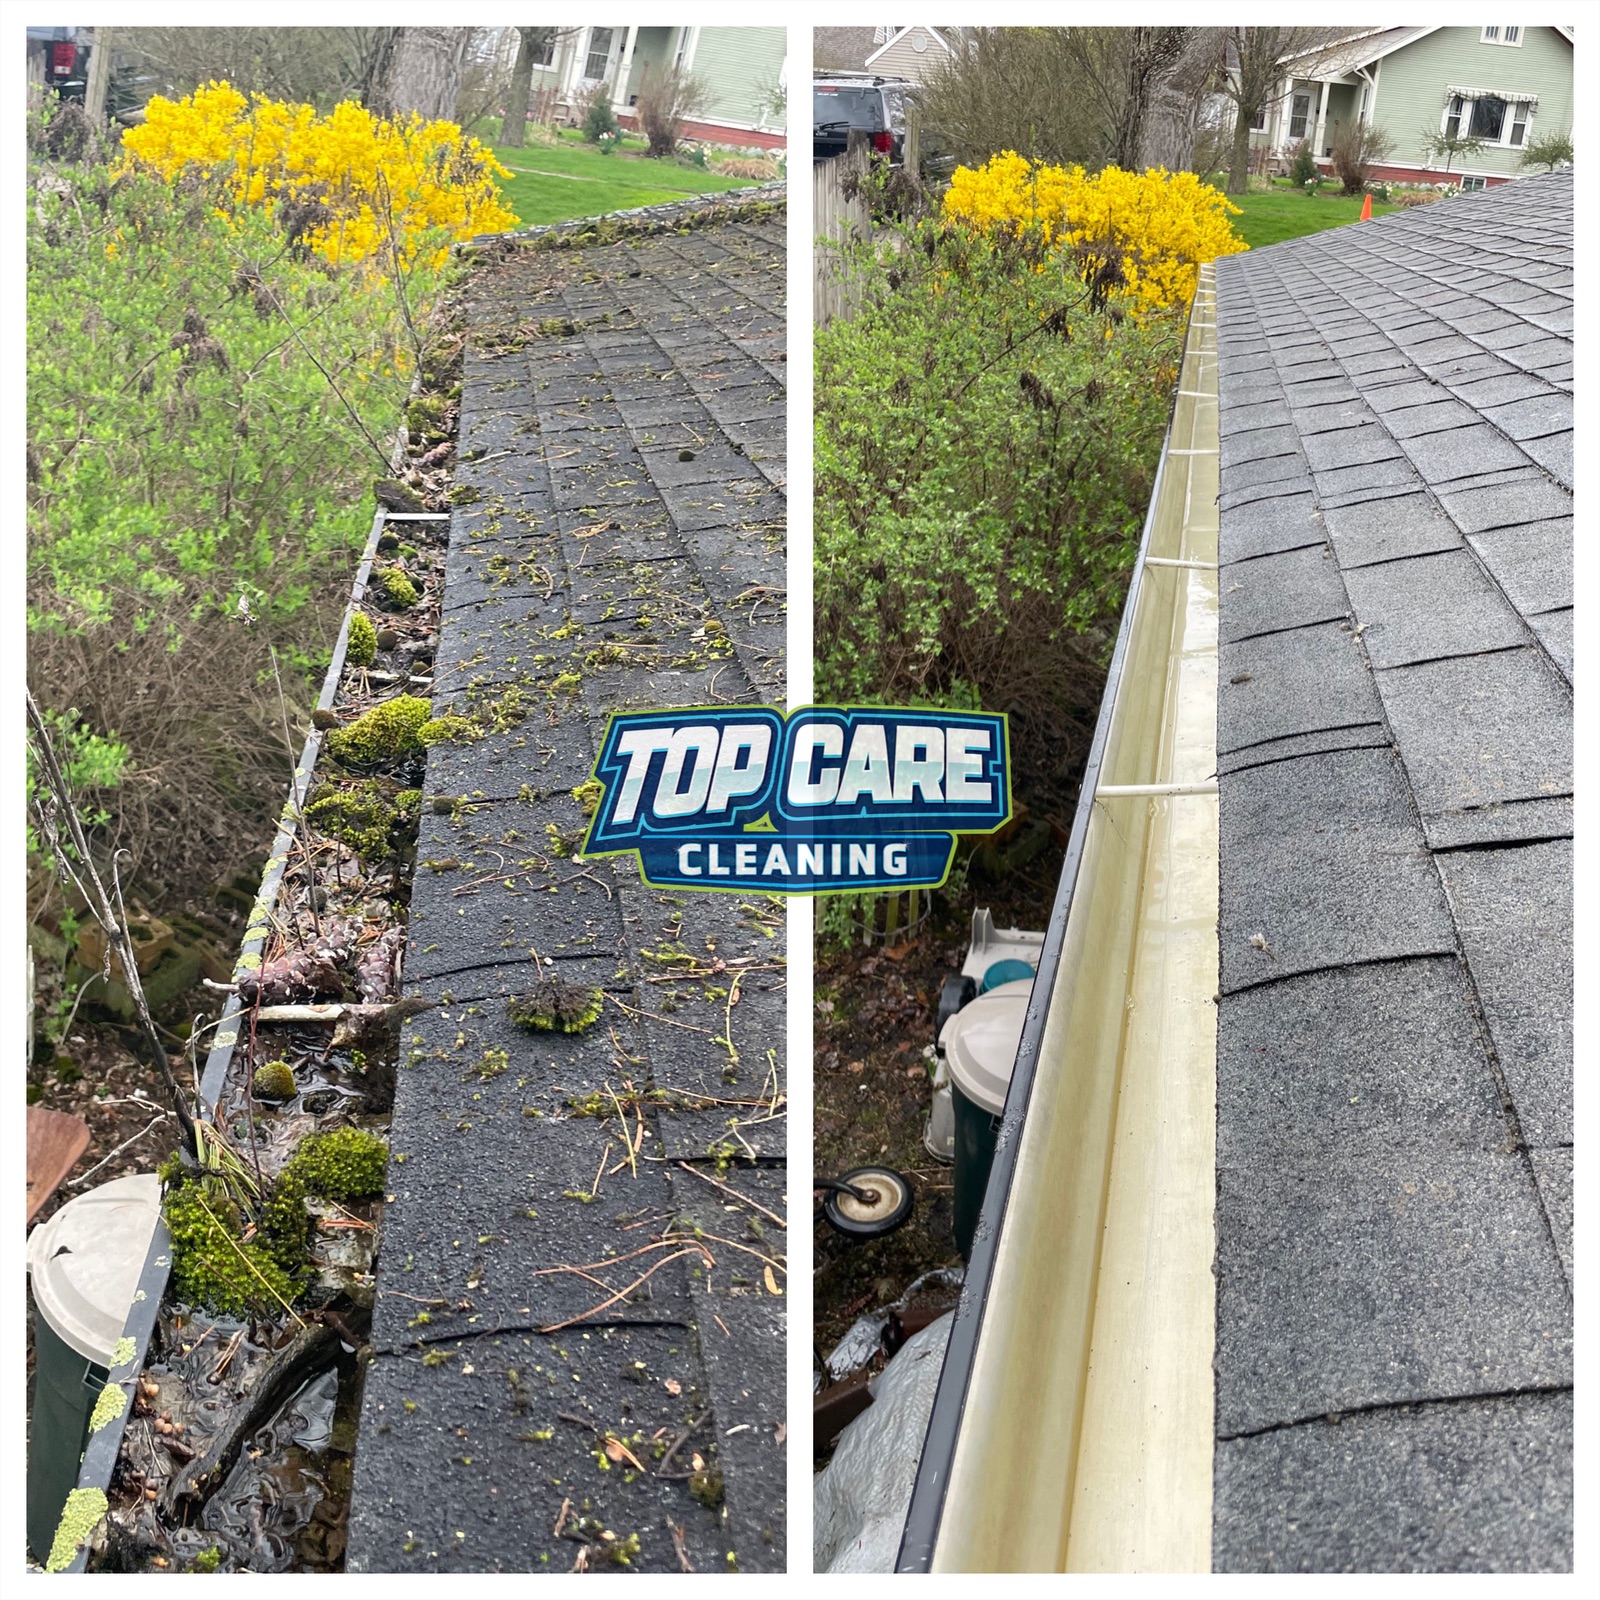 Top Care Cleaning (Grand Rapids, MI) gutter clean before and after — this is the exact kind of side by side image that closes the deal before the estimate call.
Why a Side by Side Image Closes More Jobs Than Any Single Photo
A single after photo asks the viewer to imagine the before. Most people scrolling Google Maps at 9pm won't bother. A side by side does the imagining for them — transformation and proof in one frame.
For Top Care, the gutter cleaning posts are the clearest example. A photo of clean gutters is fine. A two images side by side of the sludge we pulled out next to the clean aluminum? That photo stops the scroll. The homeowner with a quote sitting in their inbox sees it and books. That's not marketing intuition — that's four years of watching our close rate on quoted jobs that had a side-by-side attached to the follow-up email versus jobs that didn't.
The structural reason it works is trust. A single "after" photo could be any clean gutter. A side-by-side with the same angle, same house, same corner shot is harder to fake. The viewer registers it as evidence rather than advertisement. For a service business where five companies have 4.8 stars and similar prices, evidence is the tiebreaker.
The broader side by side photo pillar covers the format's psychology and full use-case map. This article is specifically about the production tool — how to pick one, what to watch out for, and the exact workflow we run at Top Care.
The Four Types of Side by Side Image Makers (and Which One to Use)
Not all side by side image makers work the same way. They fall into four categories. Knowing which one you're dealing with before you commit to a workflow saves time.
Type 1: Free, Single-Purpose Tools
These open straight to two upload slots and a combine button. No template library. No brand kit. No subscription tier that unlocks the actual export. The tool does one thing — joins two images — and gets out of your way.
This is the type I built. For a service business owner posting 4-8 side-by-sides a week, this is the only type that makes economic sense. The cost-per-image in time is under 60 seconds once you've done it twice.
Type 2: Free Tier of Full Design Suites
Big-design-suite tools offer a side-by-side template buried 4-5 menus deep. The free tier technically works, but the path to the export is a 15-minute tour through features you'll never touch. It's a freight-train-to-deliver-a-pizza situation. The tool is built for designers producing hundreds of outputs a day, not a cleaning company owner who needs two gutter photos joined before Tuesday morning.
These tools earn their money if you also need brand kits, presentation decks, and print assets. If you only need to combine two images, you're paying in wasted time with every use.
Type 3: Free-With-Watermark
The export works — except it ships with the tool's logo burned into your image. Pay $12-15 a month to remove it. I've written about this pattern before: it's a watermark-on-your-own-work model dressed up as a free tool. Skip it entirely. You're posting this image to your Google Business Profile with your company name and address attached. A third-party logo sitting on your before-and-after gutter photo signals to every viewer that you couldn't be bothered to use a clean tool.
Type 4: Professional Image Editors
Photoshop, Affinity Photo, batch-processing apps. These are for designers running high-volume production. The canvas control is infinite. The learning curve is steep, the subscription cost is real, and opening one for the sole purpose of placing two images side by side is overkill. It's the same over-engineered approach as the design suites — different audience, same core problem.
What to Look For in a Side by Side Image Maker
The criteria are simple. I've applied this test to every tool I've tried over the past four years.
No watermark on export
This is non-negotiable. You're posting this image to represent your business. A tool's branding in the corner of your gutter before-and-after is free advertising for the tool paid for by your professionalism. Any honest-free tool exports clean.
No rate limit on free tier
Some tools limit free users to five exports per month. For a cleaning company posting weekly on GBP plus Facebook plus Instagram, five exports is gone in two weeks. Know the limit before you build a workflow around the tool.
No deceptive UI
The download button should not be smaller than the "Upgrade to Pro" button. The export path should be direct — click download, get the file. If the tool redirects you through an upsell screen every time you export, the design is adversarial by intent. That's not a tool built for your workflow.
Native resolution export
Your phone shoots in 12-48 megapixels. Most side-by-side image makers downsample to 1080p or 720p on the free tier. The result looks fine on a phone screen but turns soft if a customer zooms in or if you ever print it. A quality tool exports at the resolution of your source images. If it's downsampling on free, it's a rate limit dressed up as a technical limitation.
The 60-Second Workflow We Run at Top Care
Here is exactly how we run the Monday production session for Top Care's weekly GBP post. Once the workflow is embedded, each image takes under 90 seconds including the upload and download.
Step 1: Pull both source images
Open your camera roll or photo drive. Find the before and the after. Confirm they're the same orientation — both landscape or both portrait. A landscape before combined with a portrait after produces a lopsided composite that looks amateurish. Fix orientation in your phone's native photo app before opening the side-by-side tool.
For gutter cleans specifically, we shoot the before from the ladder looking down at the packed debris. After the clean, same angle, same distance. That match is what makes the side-by-side legible as evidence rather than two random photos next to each other.
Step 2: Open the tool and upload
Go to a side by side image maker with two upload slots visible on the landing page. Upload the before on the left. Upload the after on the right. If the tool makes you build a project or name a file before you can upload, close that tab.
Step 3: Choose your layout
For tall subjects — a house facade, a gutter run, a roof section — use the left-right (vertical-split) layout. The viewer reads left-to-right naturally, so before on the left and after on the right is intuitive. For wide subjects — a long driveway, a fence line — use top-bottom (horizontal-stack) to avoid cropping the edges.
For gutter photos, I almost always use vertical-split. The gutter is a linear horizontal subject, but the angle is usually from the side, which produces a frame that sits naturally in a vertical split.
Step 4: Optional — small Before/After labels
If your tool supports it, add "Before" and "After" text labels in the top corners. Small, white text, low-contrast background. Keep them corner-placed. Anything bigger than a small pill label and the label starts to dominate the image instead of the transformation.
Skip the labels entirely if the transformation is obvious. Gutter sludge before / clean aluminum after doesn't need a label. The viewer isn't confused about which side is which.
Step 5: Export at native resolution
Click download. Save to your phone or drive. The file should be the full resolution of your source images. If the file is noticeably smaller than your originals, the tool downsampled it. For weekly GBP posts, downsampled is acceptable — but know what you're getting.
Step 6: Post
For Top Care, the side-by-side goes to:
- Google Business Profile as that week's post (Tuesday morning, consistent schedule)
- Facebook and Instagram the same day (different caption, same image)
- The follow-up email when a quote is still open and the customer hasn't responded
The GBP photo posts help increase business visibility according to Google's own documentation — consistent posting is the simplest way to stay active in local search. The side-by-side format maximizes the impact of each post because it carries transformation proof rather than a single context-free after shot.
The Specific Mistakes That Kill a Side-By-Side Image
I've made all of these. Every single one.
Different angles on the before and after
If the before is shot from the driveway and the after is shot from the ladder, no side by side image editor will fix the mismatch. The viewer's eye notices the perspective shift and registers it as a manipulated image, not proof. Shoot both photos from the same angle, same height, same distance. For gutter cleaning, that usually means both from the top of the ladder.
Mismatched lighting
Before shot at 8am with side lighting. After shot at 2pm with overhead sun. The after looks brighter — but partly because of the sun, not the work. The viewer's subconscious flags it. Shoot before and after within the same lighting window. Overcast days are actually ideal because the flat light is consistent and doesn't change between the start and end of a job.
Logos bigger than the work
A company logo centered across the middle of the side-by-side signals "marketing" the second the viewer sees it. Use a small corner watermark or no logo at all — put your branding in the caption text. The work is the proof. The logo is the bill. Let the work go first.
Forcing mismatched aspect ratios
A portrait before and a landscape after, combined into a 1:1 square, means both photos get cropped to fit. The "after" loses the corner of the house that proved the clean was complete. Use a tool that handles the native ratio of your source photos without forcing everything into a square. The side by side photo editor article covers the pre-combination adjustment workflow if you need to fix aspect ratio mismatches before combining.
Text burned into the image
"Before" and "After" pill labels: fine. Long captions burned into the photo: wrong channel. Captions belong in the GBP post text or the social media caption. If the transformation isn't legible without a paragraph burned into the image, it's a weak before-and-after. Re-shoot it.
Where Side by Side Images Fit in a Service-Business Marketing Stack
The side-by-side format is the workhorse of the local service-business visual library. Here's where we use it at Top Care and the frequency for each.
Google Business Profile — weekly post
One side-by-side every Tuesday. Same caption template: service type, neighborhood, one technical note, one trust signal. The algorithm rewards consistency and recency. The viewer rewards proof of transformation. The weekly side-by-side satisfies both.
Estimate email follow-up
When a quote is open and the customer hasn't responded in 48 hours, we attach 2-3 side-by-sides of recent jobs in their neighborhood. The before-and-after of a gutter clean four blocks from their house lands differently than a generic follow-up email. Close rate on quoted jobs with an attached side-by-side runs noticeably higher.
Facebook and Instagram — same asset, different caption
The same image that goes on GBP goes to Facebook and Instagram the same day. The caption is longer, more conversational, sometimes includes the customer's first name if they consented. The image is identical. One production step, three platforms.
Neighborhood mailers
Once a season, we print a postcard mailer for a service area. The front is a side-by-side before/after from a job in that neighborhood. Physical mail with a recognizable nearby address converts better than stock photography or generic claims. The side-by-side is the format that works in print for the same reason it works on GBP — the transformation is immediate and legible.
Google Review replies
Occasionally a customer leaves a review that mentions a specific job. We reply with a brief thank-you and a small note about the job. If we have the side-by-side from that specific address, we mention it. It's a public signal to anyone reading reviews that the work was real and we documented it.
Side by Side Image Maker — FAQ
Is a "side by side image maker" different from a "side by side photo maker"?
No. Image and photo refer to the same file type in this context. If you're combining two JPEGs or PNGs from your phone or camera, you're working with photos and images interchangeably. Search engines index both terms — they point to the same tools and the same workflows.
Can I make a two images side by side without downloading an app?
Yes. Browser-based tools work on mobile and desktop without installation. You upload both files, choose your layout, and download the combined result. No app install, no account required for honest-free tools.
What file format should I export — JPG or PNG?
JPG for anything going to social media or GBP. The file size is smaller and the platforms recompress everything anyway. PNG if you need full transparency or plan to use the image in a design layer later. For weekly service-business posts, JPG is the right default.
How big should the combined image be?
For GBP, Facebook, and Instagram feed, aim for a combined width of at least 1200px. For Instagram Stories, at least 1080×1920px. Most modern phone photos are large enough that a quality side-by-side tool can hit these targets without upsampling.
What's the right aspect ratio for a side by side image on Google Business Profile?
GBP accepts any aspect ratio but displays photos in a roughly 4:3 crop in most views. For a left-right split with two landscape photos, a combined output of 4:3 or 16:9 works well. Square (1:1) works on Instagram. Don't overthink this — the platform will reframe the display. Export at the native combined ratio and let the platform crop the preview.
Should I use the same side by side image on every platform?
Yes, with one caveat. The image itself can be identical across GBP, Facebook, and Instagram. The caption should vary per platform — GBP posts are indexed text, Instagram captions are social, Facebook allows longer conversational copy. Same asset, platform-appropriate caption.
What if my before and after photos are different sizes?
Most side by side image makers normalize the two images to the same height before joining them. The narrower photo gets a small amount of letterboxing. If the size difference is extreme (a 4:3 landscape next to a 9:16 portrait), the combined result will look awkward. Fix the orientation mismatch at the source — correct both photos to the same orientation before combining. The two pictures side by side article covers the dimension-matching workflow in more detail.
How many side-by-sides should I post per week?
One per week on GBP is the standard cadence. Consistent and spaced. The algorithm rewards recency, and viewers on local search don't subscribe to your feed — they see one post per search session. One strong side-by-side per week is better than five mediocre ones.
I Built Hosted Snap Because a Side-By-Side Image Should Take 60 Seconds
Four years ago I was paying $120/year for a design tool that turned a 60-second task into a 12-minute production session. The tool wasn't built for service businesses. It was built for brand designers who need a full creative suite. I was using the freight train when I needed the pizza delivery.
I built Hosted Snap to solve the specific problem: a service-business owner needs to combine two photos, download the result, and post it. That should take one minute. No Pro tier required to remove a watermark. No signup wall. Honest pricing, no watermark, no influencer-tier subscription.
If you run a cleaning company, a landscaping crew, an HVAC shop — any business where the before-and-after photo is the proof — this is the tool I built for our situation. I'm still the customer.
About Alex Host
I'm Alex Host. I run Top Care Cleaning in Grand Rapids, MI — a family cleaning business my dad and uncle started in 1980. I work there with my brother. We do house washing, gutter cleaning, roof cleaning, window cleaning, carpet cleaning, and Christmas light installation. 400+ Google reviews. Forty-six years of family operation.
I also build SaaS tools for local service businesses — the kind of tools I wish existed when I was paying $4,000/month in Google Ads and getting nickel-and-dimed by every "free" app in my workflow. The whole portfolio lives at hostedbrands.com. Hosted Snap is the first free tool in the stack. There will be more.
If you're a service-business owner who's tired of paying influencer prices for tools you only use twice a week, I built the stack for us. The free tools are honest about being free. The paid stuff is honest about being paid. The side by side image maker is where I started because it was the most obvious waste in my own workflow.